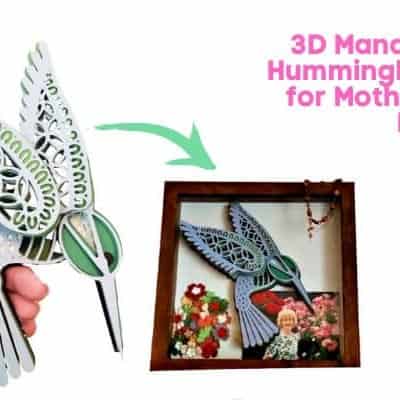
Welcome to the world of embroidery embellishments, where creativity and craftsmanship merge to weave stunning beauty onto fabric. In this article, we’re diving into an exciting project that combines the art of hand-embroidery with the incredible capabilities of the Cricut machine. Get ready to embark on an ‘E’ inspired journey as we explore the mesmerizing realm of 3D mandalas. So, roll up your sleeves and let’s stitch together something truly extraordinary!
Before we dive into the step-by-step process, let’s make sure we have all the right materials and tools at our fingertips. Here’s a handy list of what you’ll need for this Cricut and embroidery project:
Materials and Tools for Cricut:
- Cricut machine (Explore Air 2 or Maker)
- Cricut Design Space software
- Download 3D Mandala E –>>> HERE
- Fine-point blade
- Standard grip cutting mat
- Cardstock or sturdy paper for template creation
- Iron-on adhesive (optional, for securing layers)
Step 1: Selecting an intricate mandala design. Take your time to find or create an ‘E’ inspired pattern that catches your eye. Look for designs with intricate details and symmetrical elements to truly capture the essence of a mandala.
Step 2: Optimizing the design for 3D embroidery. Before cutting the design with your Cricut machine, make any necessary adjustments in the Cricut Design Space software to ensure the perfect fit for your fabric and hoop.
Step 3: Tracing and cutting the design. Load the cardstock or sturdy paper into your Cricut machine and let it trace and cut the design using the fine-point blade. This will serve as a template for your 3D mandala layers.
Step 4: Layering and assembling. Carefully trace the template onto your fabric and use the Cricut machine to cut the necessary layers. Start with the bottom layer and work your way up, adding depth and dimension to your mandala.
Once you have all the layers in place, it’s time to bring out your embroidery skills. Use an embroidery needle and floss to enhance the design with delicate stitches, filling in details and adding texture as desired.
Materials and Tools for Embroidery:
- Embroidery thread or floss in various colors
- Embroidery needles (preferably in different sizes)
- Scissors
- Fabric marking tools (water-soluble or disappearing ink)
- Embroidery hoop (size depending on your design)
When it comes to embroidering, there are several important details and considerations to keep in mind. Here is a list of ten key aspects to consider when working on your embroidery projects:
- Fabric Selection: Choose the right fabric for your project, considering factors such as thread count, weave, and color suitability.
- Thread Types: Explore different types of embroidery threads, such as stranded cotton, silk, metallic, or specialty threads, to achieve various effects.
- Needle Sizes: Select the appropriate needle size based on the fabric thickness and the thread you’re using. Thicker fabrics may require larger needles.
- Hoop Tension: Ensure that your fabric is stretched smoothly and evenly in the embroidery hoop, allowing for neat and even stitching.
- Design Transfer: Use suitable methods to transfer your design onto the fabric, such as tracing paper, water-soluble pens, or iron-on transfers.
- Stitch Selection: Choose the right embroidery stitches to complement your design and achieve the desired effect. Consider using a combination of stitches for texture and variety.
- Thread Management: Keep your embroidery thread from tangling or knotting by using thread organizers, bobbins, or thread conditioners.
- Proper Lighting: Ensure you have adequate lighting while embroidering to prevent eye strain and to accurately see the stitches and colors.
- Embroidery Tension: Maintain consistent tension while stitching to avoid loose or puckered fabric. Practice achieving the right tension for even and professional-looking results.
- Finishing Techniques: Learn various finishing techniques, such as backstitching, knotting, or weaving in loose threads, to secure your embroidery and maintain its longevity.
Here are some details on three embroidery stitches that would be perfect for your 3D mandala project:
- Satin Stitch: The satin stitch is ideal for filling in larger areas with smooth, solid blocks of color. It creates a polished and shiny effect, enhancing the visual impact of your 3D mandala. To execute the satin stitch:
- Bring the needle up from the back of the fabric at one end of the shape you want to fill.
- Insert the needle back into the fabric directly across from the starting point, creating a straight stitch.
- Repeat this process, working closely parallel to the previous stitch, until the shape is completely filled. Ensure the stitches lie flat and do not overlap or leave gaps.
- French Knot: The French knot adds dimension and texture to your embroidery project, making it perfect for creating small, intricate details in your 3D mandala. To create a French knot:
- Bring the needle up from the back of the fabric at the desired location.
- Wrap the embroidery thread around the needle two or three times, holding the wraps taut with your thumb and index finger.
- Insert the needle back into the fabric close to the entry point, but not through the same hole. Ensure the wraps stay in place as you pull the needle through, forming a tight knot.
- Backstitch: The backstitch is a versatile and commonly used stitch in embroidery. It creates solid and continuous lines, making it ideal for outlining or adding fine details to your 3D mandala. To work the backstitch:
- Bring the needle up from the back of the fabric at the starting point of the line you want to create.
- Insert the needle back into the fabric a short distance ahead in the desired direction, forming a small stitch.
- Bring the needle up from the back of the fabric, just beyond the starting point of the first stitch.
- Insert the needle back into the fabric through the last stitch made. Repeat this process, following the desired line, to create a smooth and continuous outline.
These stitches can be combined and varied to add depth and visual interest to your 3D mandala. Experiment with different thread colors, stitch lengths, and arrangements to achieve the desired effect and bring your design to life. Remember to practice and take your time to master each stitch before applying them to your project.
With your Cricut machine and embroidery skills at the ready, you’re now equipped to embark on an ‘E’ inspired journey of creating exquisite 3D mandalas. Remember to gather all the necessary materials and tools for both the Cricut and embroidery elements of this project. Follow the step-by-step instructions, and don’t be afraid to add your own creative flair along the way. Get ready to stitch beauty onto fabric like never before and watch as your masterpiece comes to life, one layer at a time. Happy stitching!
Ready to get crazy with the entire alphabet?
Click here to download all the letters and really spark your imagination ->>>
Mandala Promo Code: UNLEASH2023 FOR 50% OFF

Happy Crafting!