Discover the Magic of Decoupage and 3D Mandala with Cricut
Get ready to embark on a mesmerizing journey that combines the art of decoupage with the captivating beauty of 3D mandala designs. In this article, we’ll explore how the charismatic ‘D’ takes center stage when crafted by Cricut, adding an extra touch of magic to your decoupage projects. Whether you’re new to Cricut or a seasoned user, this guide will inspire you to create dazzling masterpieces that transform ordinary objects into extraordinary works of art. Let’s dive in and unveil the captivating world of decoupage delights!
The Beauty of Decoupage: Unleash Your Creativity with Paper
Picture this: you have a stack of colorful papers, a trusty pair of scissors, and a jar of adhesive. That’s the beauty of decoupage – the art of transforming everyday items into unique creations using paper cutouts. It’s like giving them a stylish makeover that leaves everyone in awe. Decoupage allows you to let your creativity flow and infuse your personal touch into any object you choose.
Enhancing Decoupage with Cricut: Embrace the Magic of 3D Mandala Designs
Enter Cricut, your crafting ally that takes decoupage to new heights. With Cricut’s precision cutting and versatility, you can bring your decoupage projects to life with ease. The possibilities are endless – from intricate designs to custom stencils, Cricut empowers you to add that extra sparkle to your creations. Brace yourself for the magic that unfolds when decoupage meets Cricut.
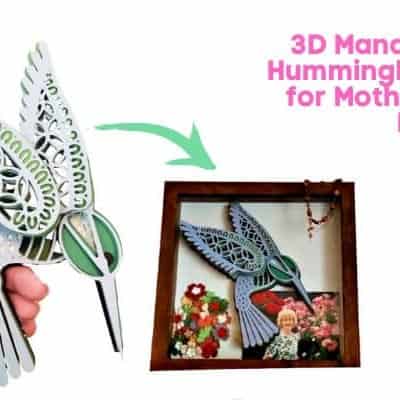
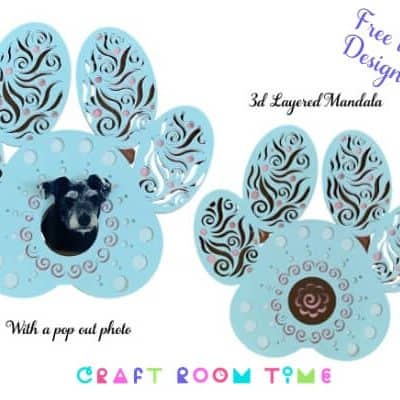
Introducing the ‘D’ 3D Mandala Design: Discover its Mesmerizing Charm
Now, let’s turn our attention to the dazzling ‘D’ 3D mandala design. Imagine adorning your decoupage projects with its intricate patterns and captivating beauty. The ‘D’ mandala adds a touch of enchantment and elegance, instantly transforming ordinary objects into extraordinary works of art. It’s the showstopper that will leave your friends and family in awe of your artistic talents.
Getting Started with Decoupage: Materials and Preparation
Before we dive into the depths of decoupage, let’s gather our materials and set the stage for crafting success. Grab your favorite papers, adhesive, brushes, and protective finishes. Don’t forget to create a cozy crafting corner, complete with good lighting and some background tunes to get you in the creative zone. Now you’re all set to embark on your decoupage adventure!

<<<- Click here to download the letter A and start your new, incredible Mandala project with your Cricut.
Decoupaging with the ‘D’ Mandala Design: Step-by-Step Guide
Let’s bring the ‘D’ mandala design to life! Pick you project then unleash the possibilities!
Step 1: Prepare Your Design in Cricut Design Space
- Launch Cricut Design Space on your computer or mobile device.
- Upload the ‘D’ mandala design file into the software.
- Adjust the size of the design to fit your project and select the desired cutting options.
Step 2: Load and Cut the Paper
- Place the chosen papers onto the cutting mat, ensuring they are securely adhered.
- Insert the cutting mat into your Cricut machine.
- Follow the on-screen prompts in Cricut Design Space to load the mat and initiate the cutting process.
- Watch in awe as your Cricut machine precisely cuts out the intricate shapes of the ‘D’ mandala design.
Step 3: Weed and Prepare the Cutouts
- Carefully remove the cutout paper pieces from the cutting mat, also known as weeding.
- Use a weeding tool or tweezers to help with intricate details, ensuring the cutouts are clean and free from any excess paper.
Step 4: Apply Adhesive and Arrange the Paper Cutouts
- Apply a thin, even layer of decoupage adhesive onto the prepared surface using a brush or sponge.
- Take the cutout paper pieces created by the Cricut machine and arrange them on the surface, following the design of the ‘D’ mandala.
- Use your fingers or a brush to smooth out the cutouts, ensuring they adhere well to the surface and eliminating any air bubbles or wrinkles.
Step 5: Seal and Protect Your Artwork
- Allow the adhesive to dry completely according to the manufacturer’s instructions.
- Apply a clear protective finish, such as varnish or decoupage medium, over the entire surface to seal and protect your artwork.
- Follow the recommended drying time for the protective finish to ensure it sets properly.
Showcasing Your Dazzling ‘D’ Decoupage Delights
Congratulations, you’ve completed your ‘D’ mandala decoupage masterpiece! Now it’s time to showcase your creativity and inspire others. Capture stunning photographs of your creations, and don’t hesitate to share them with friends, family, and fellow crafters. Your artistry deserves to be celebrated, and who knows, your creations might even become the talk of the crafting community!
Conclusion: Dive into the Depths of 3D Mandala Decoupage
As we wrap up our creative journey, we hope you feel inspired to dive into the depths of 3D mandala decoupage with Cricut. Remember, decoupage is more than just crafting; it’s an expression of your personality, creativity, and passion. So, gather your papers, unleash your imagination, and let the ‘D’ designed by Cricut take your decoupage delights to extraordinary new heights. Get ready to dazzle the world with your artistic prowess and craft captivating pieces that leave a lasting impression.
Ready to get crazy with the entire alphabet?
Click here to download all the letters and really spark your imagination ->>>
Mandala Promo Code: UNLEASH2023 FOR 50% OFF

Happy Crafting!