Greetings, fellow crafting enthusiasts, parents, and devoted grandparents! If you’re on the hunt for delightful and creative ways to spend cherished moments with your grandkids, you’re in for a treat. I’m here, your crafting-loving grandmother, to take you on a journey into the enchanting world of paper crafts. Today, we’re diving headfirst into the captivating realm where simple paper blossoms into extraordinary creations, leaving your grandkids in awe and brimming with joy.
Tools and Supplies You’ll Need:
Before we embark on our crafting adventure, let’s gather our tools and supplies. Having everything ready ensures a smooth and enjoyable crafting experience.
- Assorted Paper: A vibrant assortment of colored and patterned papers.
- Scissors: A pair of safe, child-friendly scissors.
- Glue and Tape: Craft glue or double-sided tape.
- Markers and Crayons: A colorful selection of markers and crayons.
- Embellishments: Buttons, ribbons, stickers, and sequins.
- Rulers and Pencils: For precision and guidelines.
- Googly Eyes: The charming touch that brings creations to life.
Estimated Time to Complete:
Plan for a delightful crafting session lasting about 1 to 2 hours. Remember, the goal is to have fun and let imagination take the lead.
Let the Magic Begin: Crafting Your 3D Paper Garden
Today, let’s embark on a whimsical project that will transport your grandkids into a world of imagination and creativity: the 3D paper garden. This is a project that combines the beauty of nature with the joy of crafting.
Step 1: Choose Your Paper
Start by selecting a range of colorful papers. This is an excellent opportunity to repurpose old magazines, turning mundane pages into vibrant blossoms.
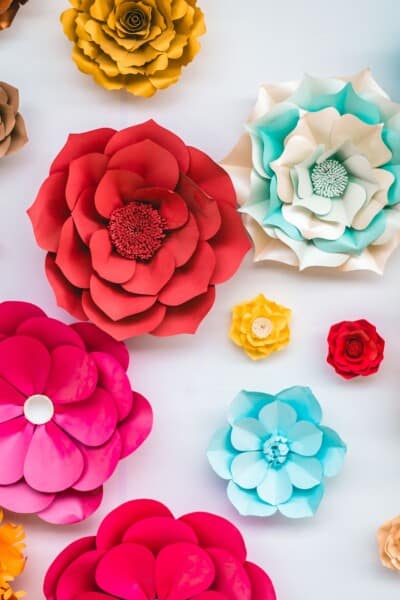
Step 2: Craft Blooming Flowers
- Draw flower shapes in varying sizes on the colored paper.
- Cut out the flower shapes meticulously.
- Play with layering – arrange the flower shapes slightly off-center to create a delightful 3D effect.
- Enhance the flowers by adding buttons or sequins to their centers, simulating the stamen.
Step 3: Fluttering Paper Butterflies
- Cut out butterfly shapes from an array of colored paper.
- Gently fold each butterfly in half, forming a crease down the middle.
- Attach the butterflies to a string or thread, crafting a charming butterfly garland.
Step 4: Adorable Paper Critters
- Dive into the world of imagination and craft tiny creatures like ladybugs, bees, and snails.
- Utilize googly eyes to infuse them with personality.
- Secure these charming critters onto popsicle sticks, giving your grandkids playful companions.
Step 5: Assemble Your Paper Garden
- Find a sturdy piece of paper to serve as the garden base.
- Playfully arrange your paper creations – flowers, butterflies, and critters – on this base.
- Secure them in place using glue or tape, allowing layers to create a delightful 3D garden scene.
Summary: Crafted with Love and Creativity
Congratulations! You’ve just crafted a whimsical 3D paper garden that’s a testament to your grandkids’ imagination and the joys of spending quality time together. As they marvel at their creation, you’ll witness the magic in their eyes and feel your heart swell with pride.
Next Up: Crafting Wonders with Paper: Let’s Dive into the Enchanted World of Pop-up Cards!
But hold on, our journey is far from over. In my next blog post, we’ll explore the captivating realm of pop-up cards. Your grandkids will learn to create cards that unfold into mesmerizing surprises, leaving recipients amazed and delighted. Stay tuned for more crafting adventures that will keep the excitement alive!
Until then, keep those scissors and glue sticks handy, and let the enchantment of paper crafts continue to unfold. Happy crafting, my fellow creative souls!