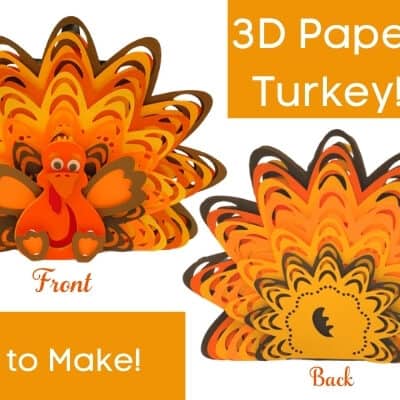
As the aroma of roasting turkey fills the air and loved ones gather around the table, Thanksgiving brings a sense of gratitude and warmth. Elevate your holiday celebration by adding a personal touch to your Thanksgiving table with DIY Thanksgiving Place Cards. These simple yet elegant cards not only guide your guests to their seats but also serve as heartfelt tokens of appreciation. Join us as we embark on a crafting journey to make this Thanksgiving feast truly special.
Supplies List: Prepare for a creative endeavor by gathering the following materials:
- Cardstock or Thick Paper: Choose autumnal colors or neutrals that complement your Thanksgiving decor.
- Cricut Machine or Craft Scissors: Select the tool that suits your preference for cutting out intricate designs.
- Thanksgiving-themed Design Files: Opt for designs that capture the spirit of the holiday, such as pumpkins, acorns, or thankful messages.
- Fine-tip Pen or Calligraphy Pen: Perfect for writing names or messages on the place cards.
- Embellishments (Optional): Consider adding ribbons, small artificial leaves, or other embellishments for an extra festive touch.
Estimated Duration: This crafting project is not only a joy to create but also an ideal way to spend a leisurely afternoon. Anticipate spending approximately 1 to 1.5 hours on this project, allowing time for precision and creativity.
SVG Options:
Step-by-Step Instructions:
Step 1: Choose Your Thanksgiving Designs Select Thanksgiving-themed design files that resonate with the aesthetic you envision for your table. Consider elements like pumpkins, acorns, or grateful messages. If you’re using a Cricut machine, upload these designs to the Cricut Design Space.
Step 2: Customize and Cut Out the Place Cards If using a Cricut machine, customize the size and details of your chosen designs in the Cricut Design Space. Once satisfied, let the machine cut out the intricate shapes. If you’re opting for manual cutting, trace the designs onto your selected cardstock and carefully cut them out with craft scissors.
Step 3: Add Personalization with Names Take your fine-tip pen or calligraphy pen and add a personal touch by writing the names of your guests on each place card. This step not only guides your guests to their seats but also adds a thoughtful element to your table decor.
Step 4: Optional Embellishments (Optional) Enhance the visual appeal of your Thanksgiving place cards by adding optional embellishments. Consider attaching small ribbons, artificial leaves, or other festive elements that complement the overall theme of your table.
Step 5: Arrange Place Cards on the Table Before your guests arrive, arrange the personalized place cards on the table. You can place them directly on the plates or position them creatively using holders or napkin folds. This step adds an inviting touch to your Thanksgiving table setting.
Step 6: Capture the Moment As your loved ones discover their personalized place cards, be ready to capture the moment. These simple yet meaningful touches contribute to the warm and memorable atmosphere of your Thanksgiving celebration.
You’ve successfully crafted DIY Thanksgiving Place Cards that add a personal and heartfelt dimension to your holiday table. As you gather with family and friends to give thanks and share a delicious meal, these place cards serve as a tangible expression of appreciation for the presence of each guest.
This Thanksgiving, let your table decor tell a story of gratitude and warmth. The effort you’ve put into creating personalized place cards will surely be noticed and cherished by your guests. Stay tuned for more creative inspirations as we continue our series of festive DIY projects.
Next in the Series: In our upcoming crafting adventure, we’ll guide you through creating Fall-Themed Throw Pillow Covers. Transform your living space into a haven of autumnal comfort with these cozy and customizable pillow covers. Get ready for another round of creative joy!
Happy Crafting!


Leave a Reply