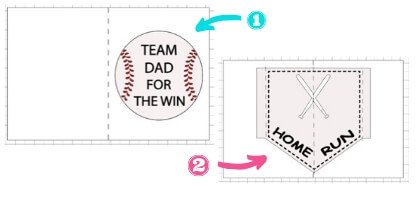
Father’s Day is approaching and so is baseball season! What better way to show dad how much you love him and his love of baseball by creating this layered baseball pop up card for dad with free SVG?
Take a few minutes to see how to bring the SVG in and create the Score and Deboss lines!

-
Save
My love of mandalas sparked a thought to create this card that you can later recycle by taking off the Baseball and framing it!
-
Save
Level: Intermediate
Supplies for Layered Baseball pop up card for dad:
- Red Cardstock
- White Cardstock
- Black Cardstock
- Cricut Machine or Silhouette
- Black Pen for Cricut or Silhouette
- Debossing Tool
- Scoring Tool
- Mat
- Glue
- Foam dots (optional)
Upload the SVG into Design Space.
After you bring the SVG file into Design Space, there are a few things you need to do before cutting. Be sure to watch the video above for step by step instructions.
The following is a recap of the video.
-
Save
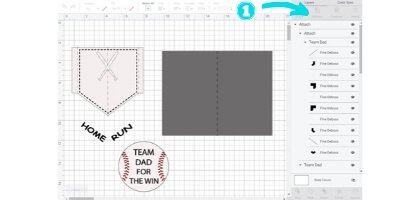
Step 1: Once the design is brought into Design Space, select it and ungroup (1). Then move the parts to be as shown. The Text “Home Run” will still be on the Plate. See Step

-
Save
Step 2: Select the line in the middle of the card (1). At the top of the tool bar select “SCORE” instead of “CUT”. Then select the card and the line together and click on attach. Once you do this you will see it changed from Cut to Score on the menu (2)
-
Save
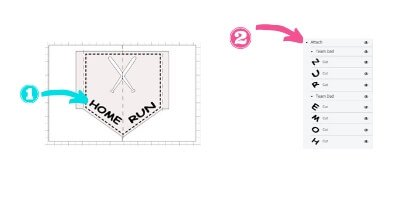
Step 3: Select the letters in the words “Home Run” from the layer menu to the right by holding the shift key down and selecting them all. Then click on Attach. Once you have done that, move them off the home plate.

-
Save
Step 3: Select the Middle and the two lines that will be the folds in the card and select “SCORE” instead of “CUT” in the upper menu at the top. Once you do this you will see it changed from Cut to Score on the menu. (2)
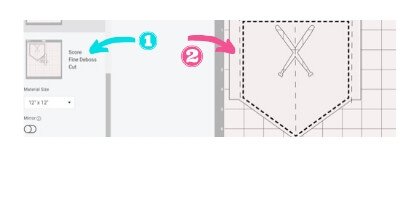
Step 4. Select the Stitches on the plate. It is easiest to select all the bits and pieces on the layer menu to the right by holding down the shift key and selecting them all. Change these to “Deboss” instead of “CUT”. Once you do this, you will see them change to Fine Deboss on the layered menu as shown in picture above. (3)
Step 5. Then select the entire plate (not the words) and click on attach.
-
Save
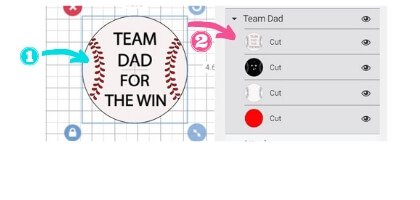
The baseball itself is 4 layers. These are all ready to cut so you don’t need to do anything with them.
-
Save
Step 6: I like to save the project first and then check the mats to see if I missed anything. You should have a mat that have the Score, deboss and cut for the home plate, a mat for the score and cut for the card itself, and the rest are all cut mats.

-
Save
Step 7: Once all the pieces are cut, scored and debossed, assemble them with the baseball on the top, then attach the words to home plate, and fold and glue the two sides of home plate to the inside of the card adjusting so that when you open it it pops open a bit off the back of the card.

-
Save
One alternative to gluing all the layers together on the baseball, is to use foam dots between the layers giving it a 3D Layered Mandala look that you can frame!

-
Save
Fold the home plate and place inside the card so that the fold does not go past the front end of the card and glue the tab down. I used Tacky glue.

-
Save
Then with the home plate still folded, glue the other tab and then close the card and hold down until glue has a chance to set.

-
Save
Now when you open the card the home plate pops up! Plenty of room for all the handwritten sentiments!
I hope you enjoyed this Layered Baseball Pop Up Card for Dad. Share a photo of it and dad’s expression in our Facebook Group CraftRoomTime.
Check out our other Father’s Day Card for Cricut Design Space
Pin and share it for later:

-
Save
