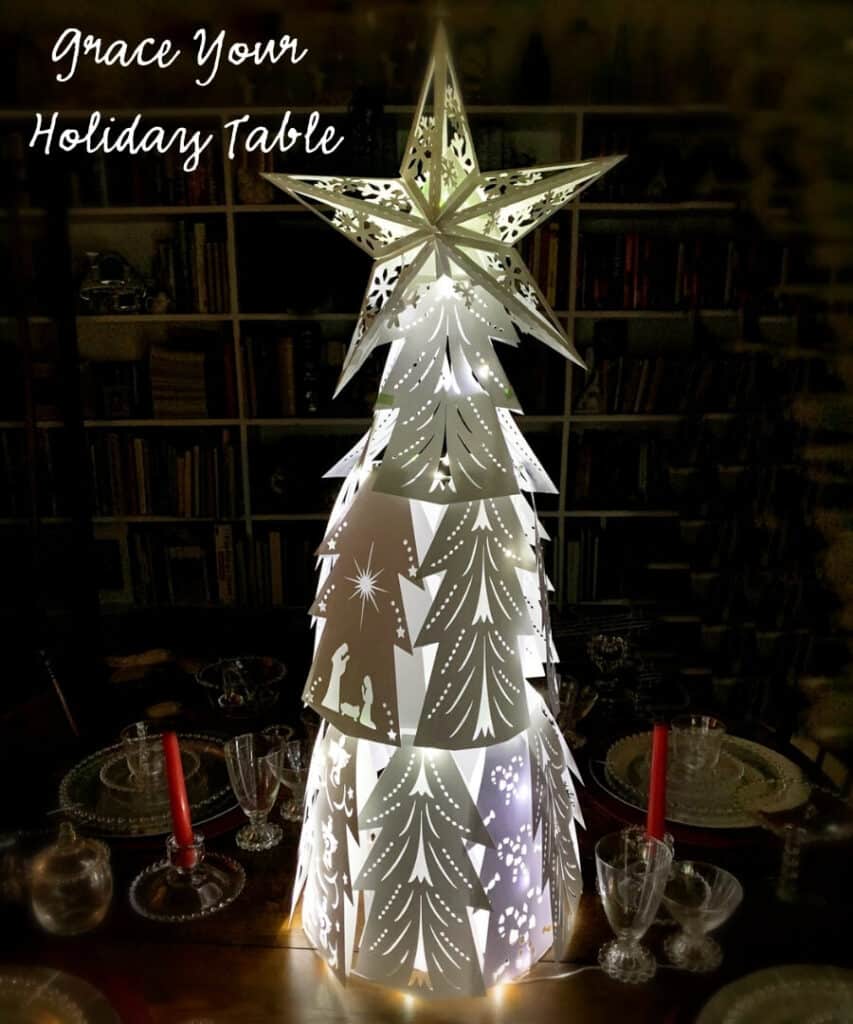
The season is drawing closer! It’s a perfect time to start making some Holiday decorations for your home and this Elegant 3D Light Up Paper Christmas Tree is sure to be a hit this year! It was even featured on the first ever Annual Holiday Maker Fest!

So easy to make yet so many possibilities for this file for your Cricut or Silhouette. Make the Green Glitter Tree to put in any room of your home, or the White Sparkly Tree to Grace your Holiday Table, or even make one to hang on your wall!
You can even use the files to create a holiday banner. It would look stunning in front of a large window or even hung across the fireplace mantle!
Special Holiday surprise just for you!

Before we get started, I have a special for you! You can get the Holiday Pass for only $17! It gives you unlimited commercial and personal use of all my “HOLIDAY” files found exclusively in the Holiday Shop! You can download one or all and you have until October 31, 2021 to get as many Holiday Files as you want!
As I add new designs to the shop, you will continue to get them for free! The files include SVG, DXF, EPS, and PNG for all you cutting and printing machines! This is already well over a $100 value!

It also includes the files for the Christmas Trees for both the Green and the White Tree & Banner as shown in the video and below!
If you want to purchase that now, Click Here. You will then get to download the pdf that has the coupon code so you can print and keep it handy all through the holidays!
You may want to download the supplies and instructions so you will have it for later.
Supplies for the Elegant 3d light up paper christmas tree
- Green Glitter Cardstock (3 pks of 10)
- Fairy Lights 33 Ft 100 LED
- Tomato Cage Plant Support 33 Inch
- Green Painters Tape .94 inch
- Cricut Maker
- Cricut Cutting Mat
- Cricut Weeding Tool
- Glue Gun (instead of tape)
- Glue Sticks
- White Archival Tape (for white tree)
- White or Other Colored Cardstock if preferred (85 – 100 lb suggested)
Instructions
Step 1:
Download the digital file(s) you received and save them on your computer.
If you need to learn how to do this, please go here:
Step 2:
Upload the SVG file to Design Space (Cricut) and follow the same process for these two files:
- Bottom Layer
- Tree Topper

Open Cricut Design Space and click on New Project.

- Click on Upload

Then click on Upload Image:

- Then Drag and Drop your SVG file you extracted here
- or click browse to find the file
- Then click continue

- Enter a name for your file
- Enter tags to make it easier to find later
- Click on Save

- Your image will appear here
- Click on it and the box around it will turn green
- Click on insert image and the image will then be available on your canvas in Design Space
Step 3:
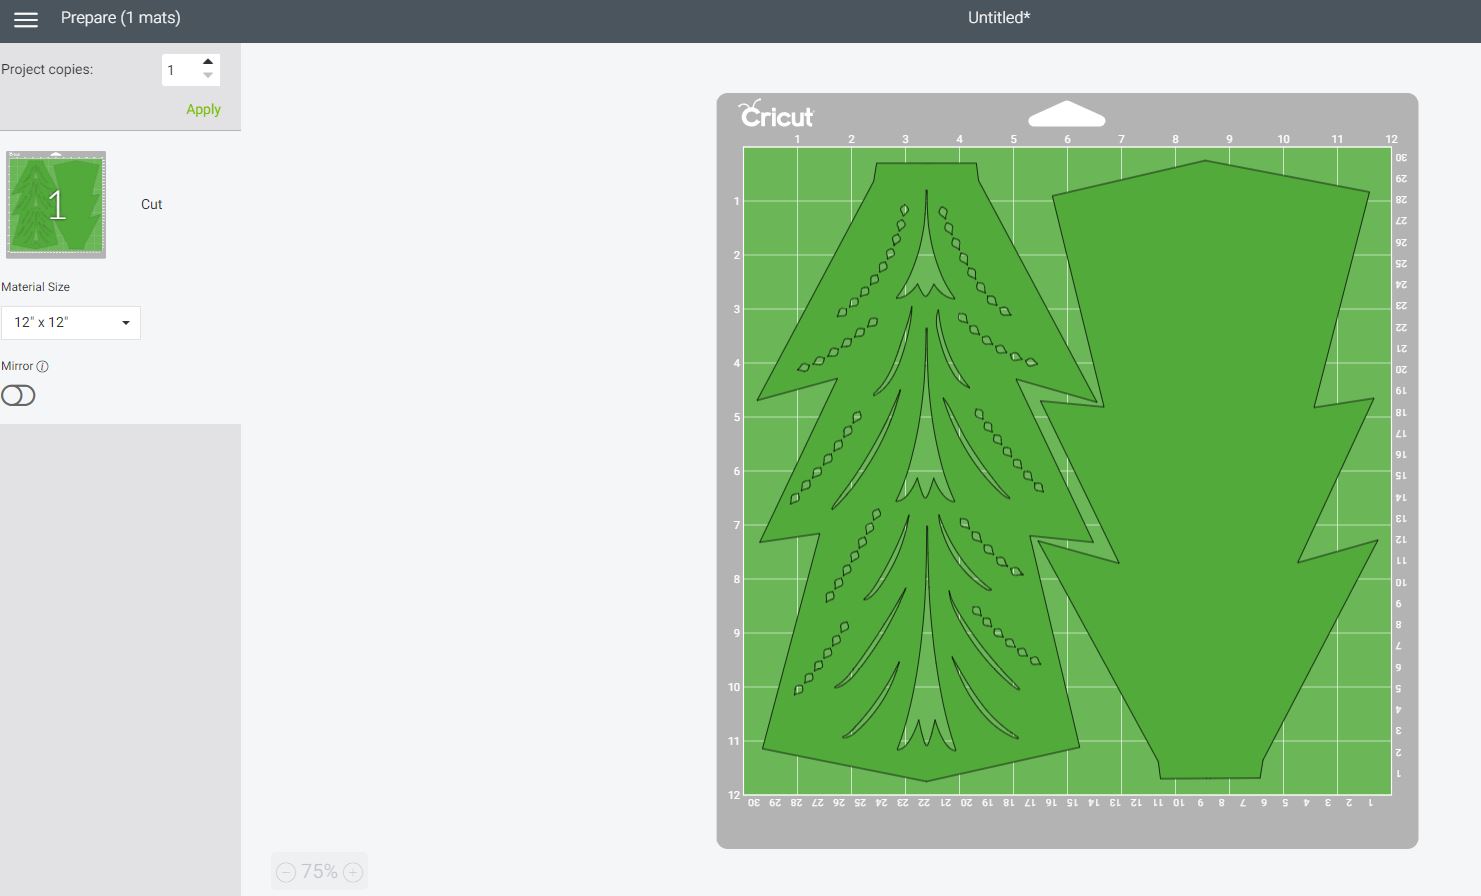
Cutting the designs
The designs are already sized to fit the tomato cage from the supply list. You can resize them as needed to fit a smaller cage if needed.
The branches are grouped, leave them grouped if you plan to cut both designs.
You will need to select them and click on attach so they will cut on a 12×12 cardstock and mat.
If you plan to only cut one of the designs, ungroup and select the one you want.
You can also duplicate it and set it next to the other one then group and select attach so they will cut on a 12×12 cardstock and mat.
The tree topper will cut on an 8 ½ x 11 cardstock and a 12×12 mat.


On the Cricut, select your cardstock material from the drop down menu.
Your settings for the blade should correspond to the cardstock you select.
For the Glitter Cardstock on the supply list, we used “Glitter Cardstock” setting, with “More” pressure to cut.
Cut:
1 of each triangle for the tree topper (use heavy cardstock or cut doubles and glue together)
3 branches for the top
6 branches for the second layer
9 branches for the third layer
When removing from the mat, keep the center designs as you can use these to hide the cage wires if so desired, or make cute thumbprint cards with the kids!

Step 4: (Optional)
The tree topper is meant to go over the top of the prongs of the cage to hold the white plastic spool the lights come on that will then hide and secure the prongs.
It also provides a place for a tree topper designed to go with the tree.
As an alternate, you could fold the tops of three branches into a triangle to sit on top as well. This would require them to be hidden with another topper of your choice.
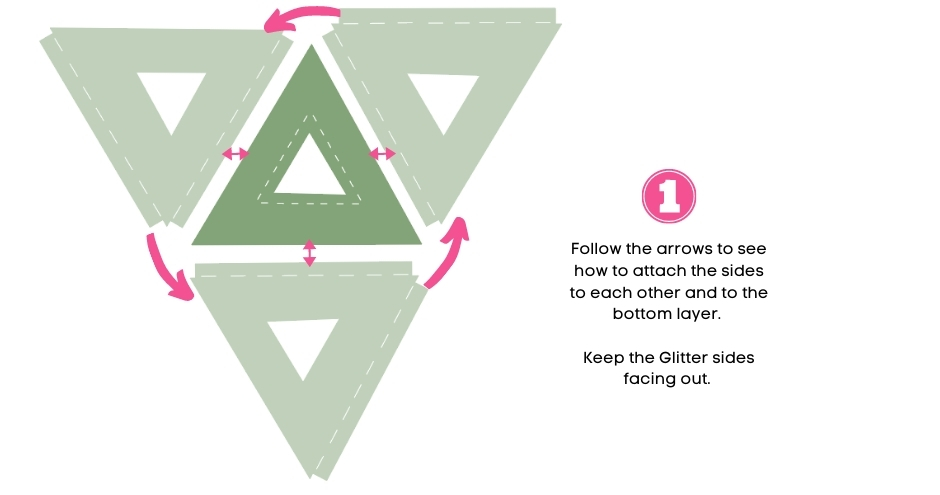
Building the Tree Topper (optional)
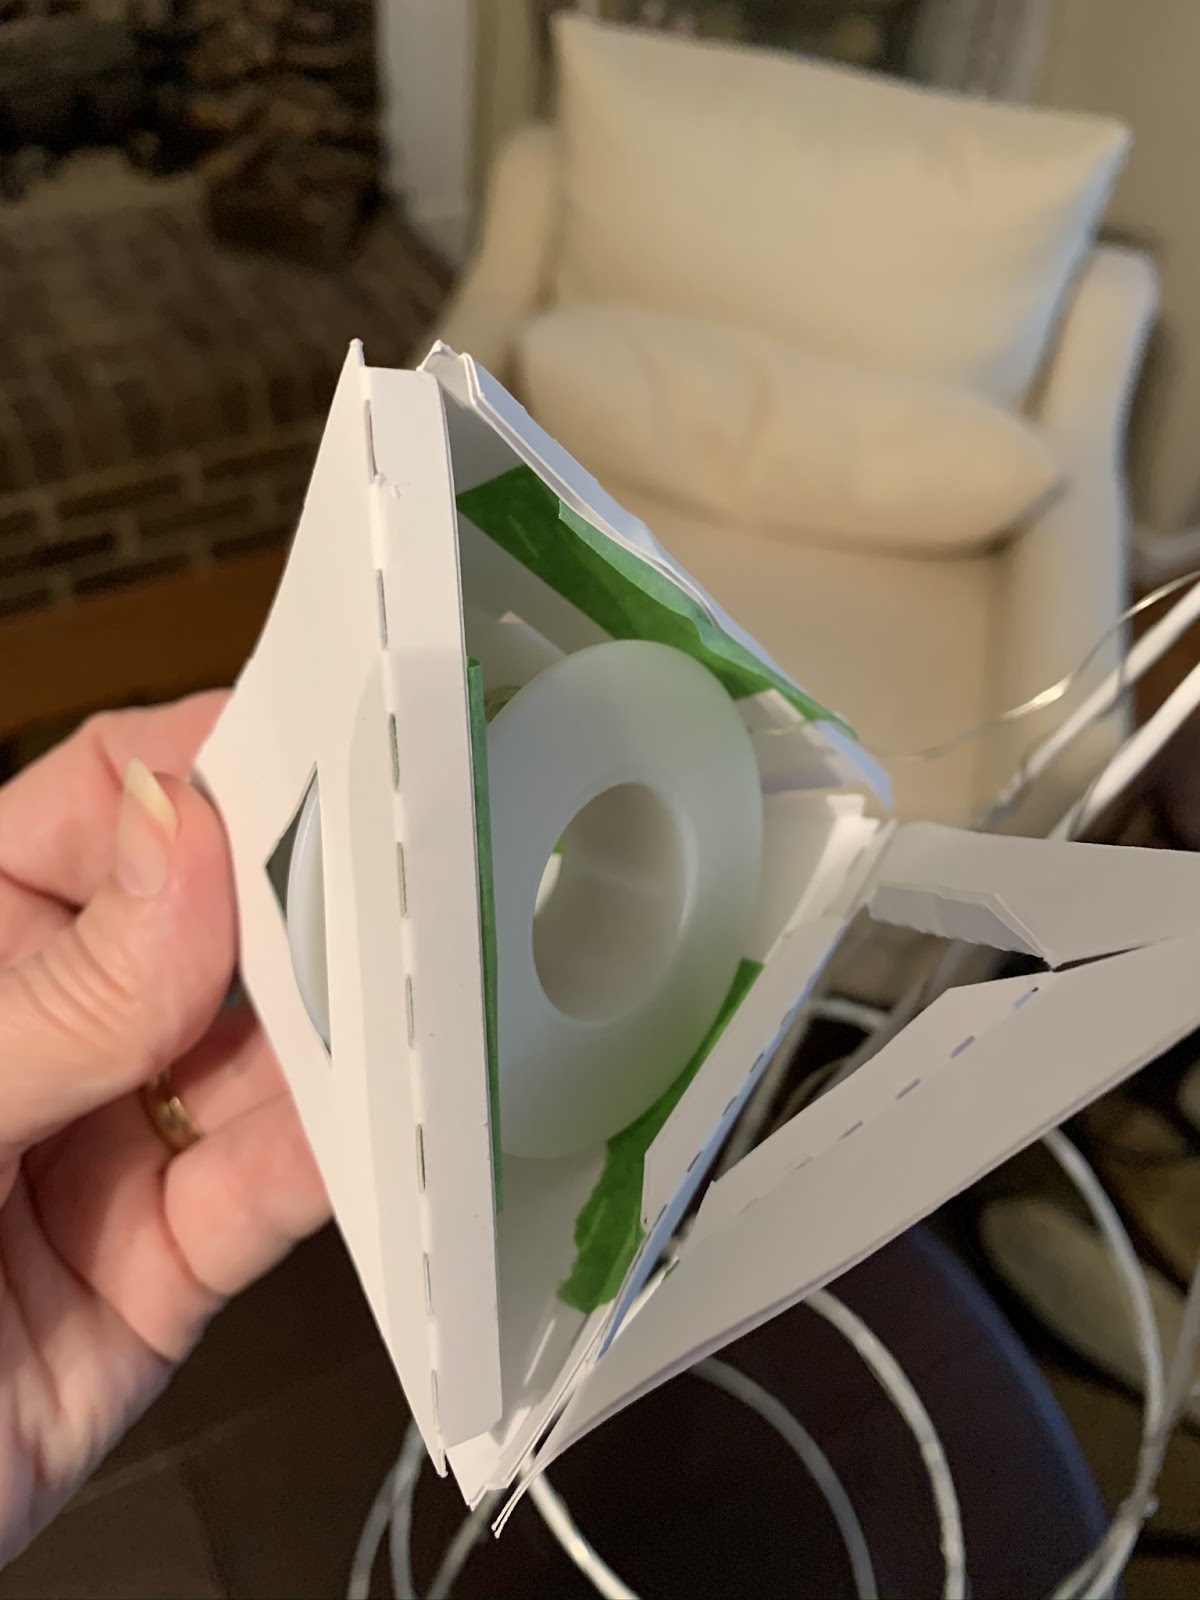
The tree topper is made to sit on top of the tomato cage (will hold the white plastic ring that comes with the fairy lights from the supply list).
The topper was designed to work with tree toppers found i the Holiday collection here: _________________________
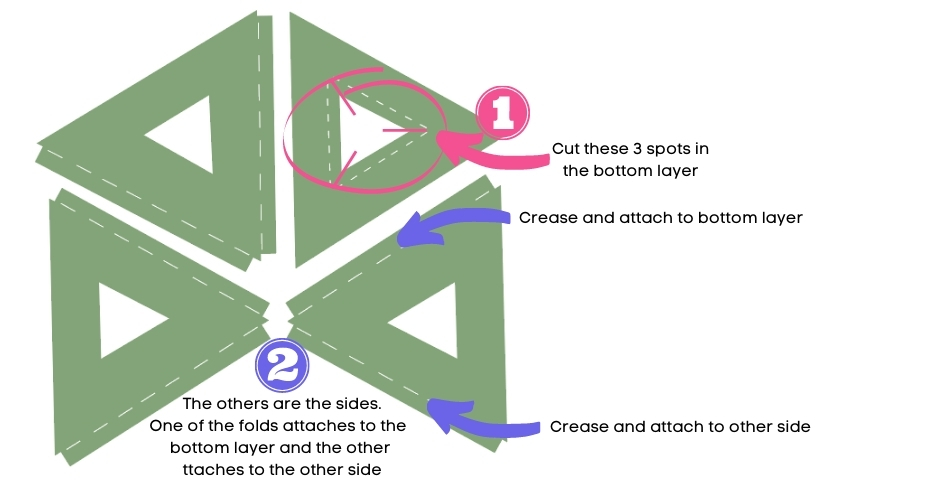
Assemble with glue or tape.
If you are putting the white ring in, wait until you are ready to put it inside and close the last side up.
Step 5
Add tree branches to tree topper
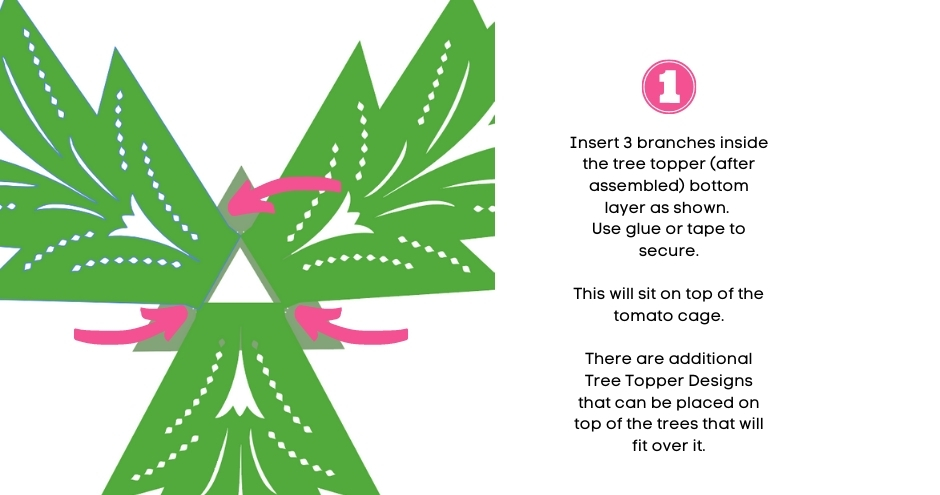
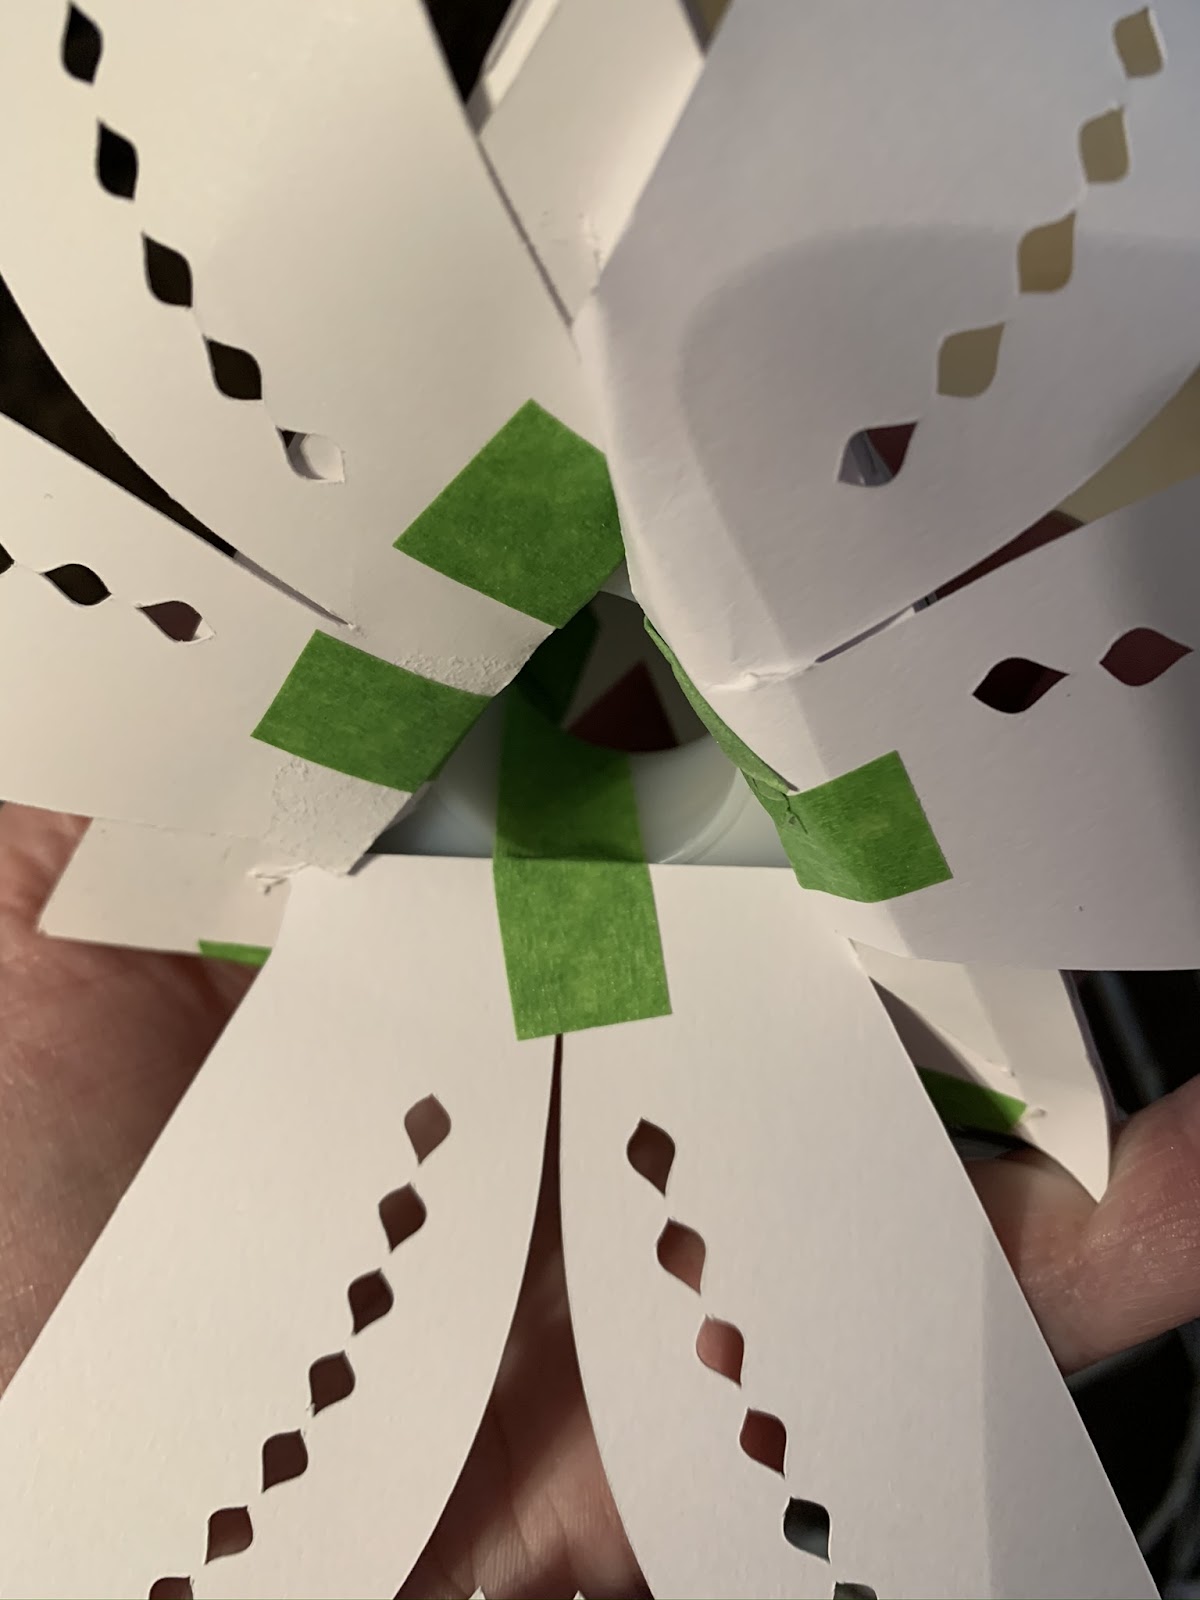
The tree branches go inside the triangle as shown. If needed, trim the tops of the branch to fit inside the topper. Use tape or glue to adhere.
This completes the top of the tomato cage. See photos below to see how this was assembled. Green painters tape was used for better visualization purposes only.


Jennifer Maker’s Star was placed on top of the topper as shown:
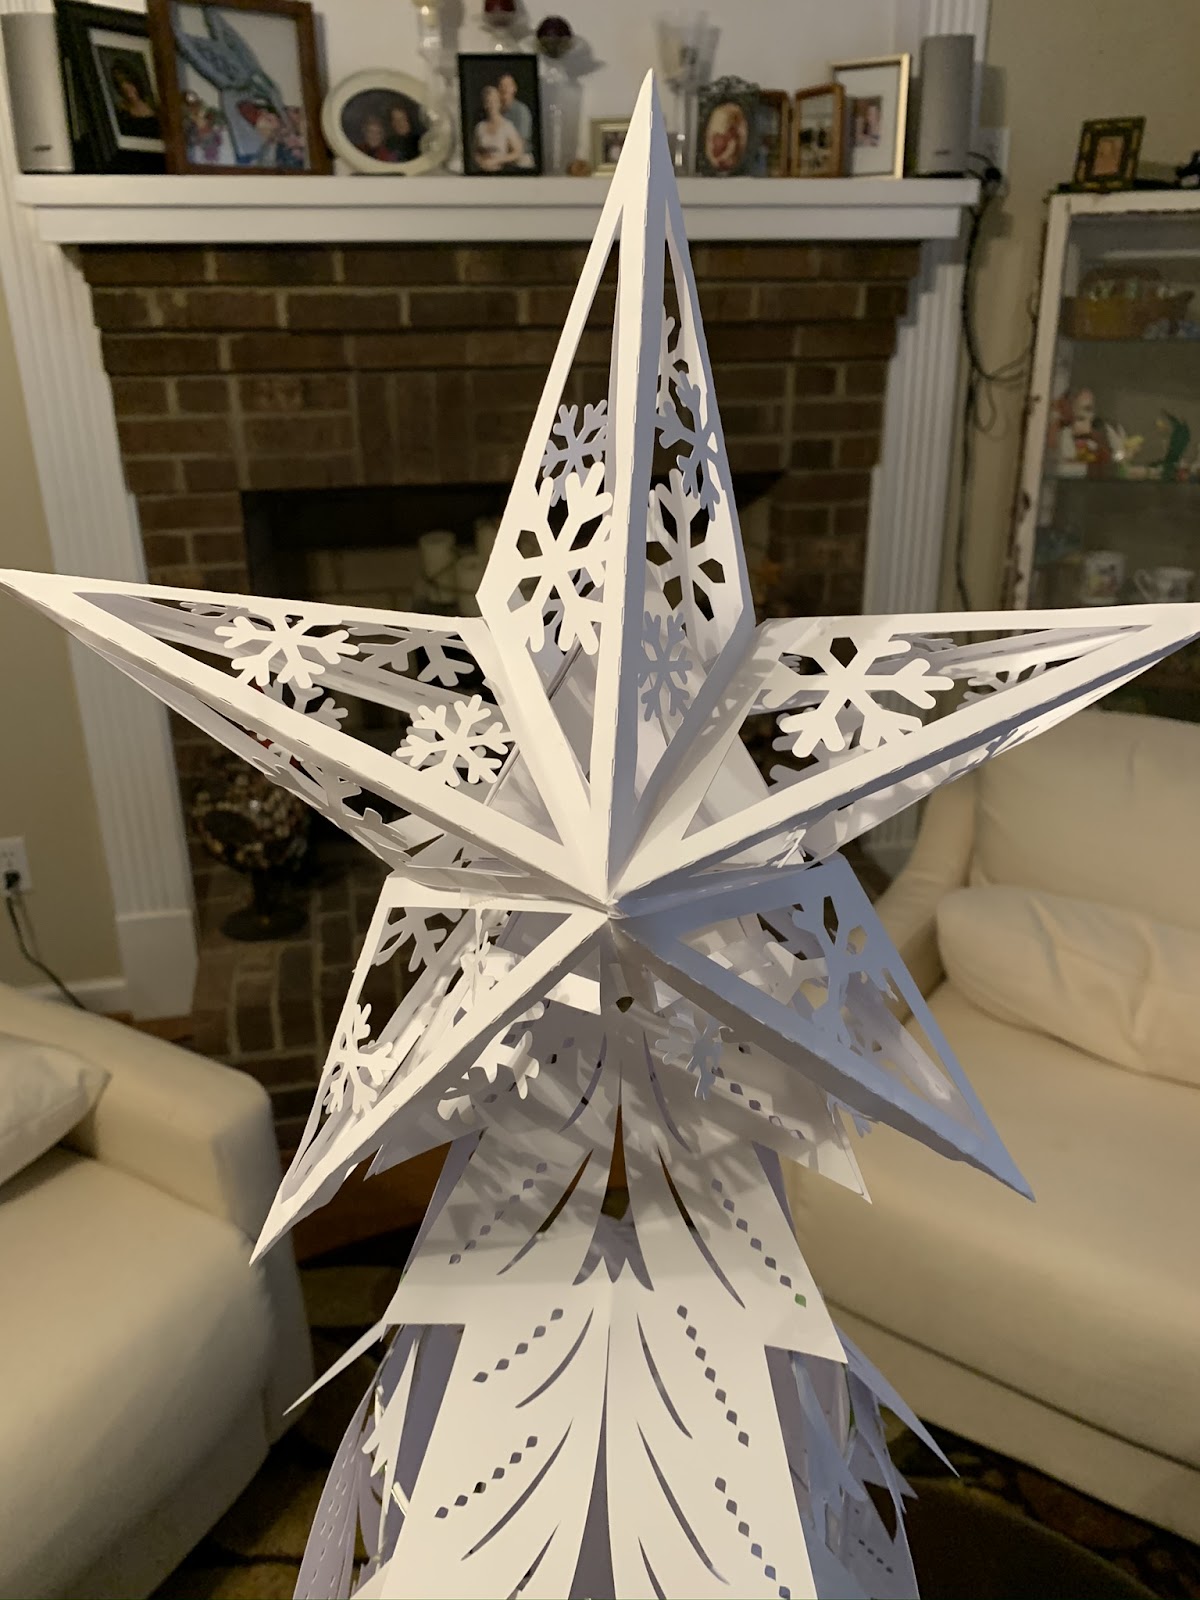
I made a space in the star so I could insert it on top of the triangle.
You can find her star here:
Step 6
Prepare the Tomato Cage
Consider spray painting the cage to match your paper color scheme.
For the full circle tree, take the fairy lights and string them around the cage starting at the bottom.
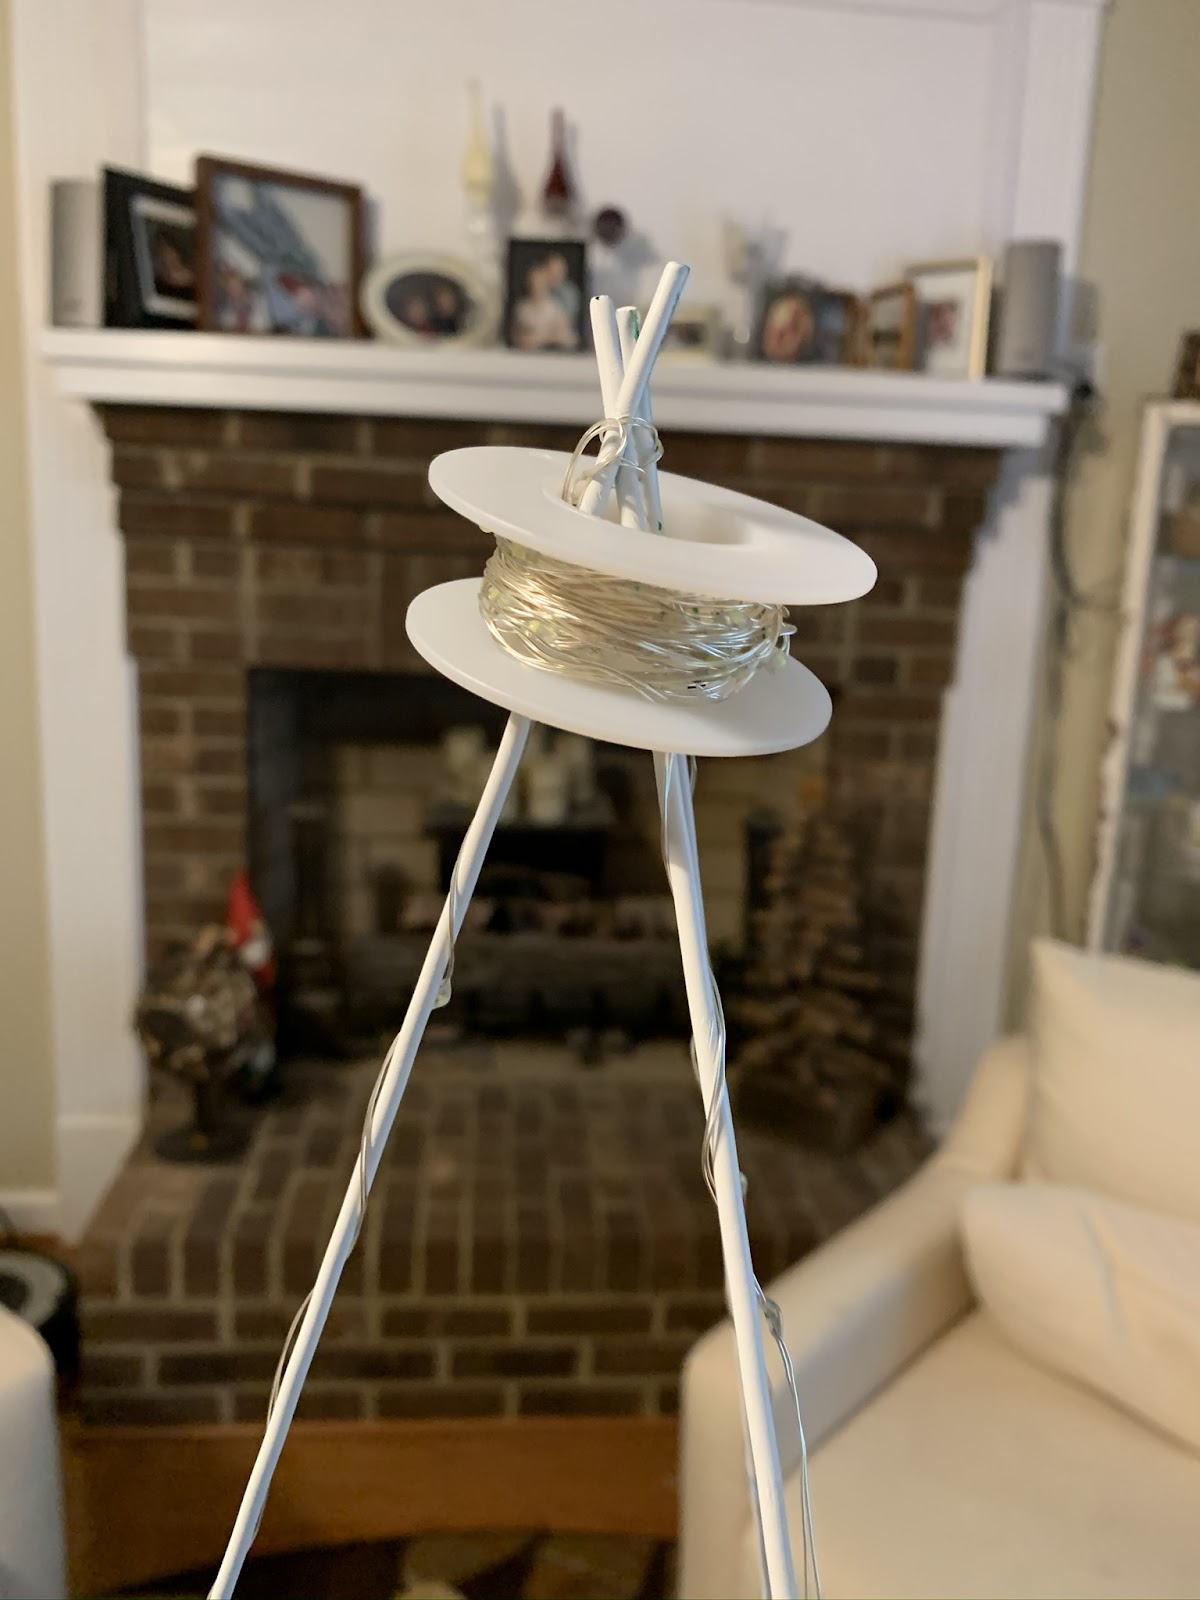
If using the fairy lights and cage in the supply list, wrap the lights around the tree twice making sure the end is at the top. At the top wrap the wires around the three prongs at the top to secure them together to fit inside the tree topper. The white spool will fit inside the tree topper or you can use the remaining lights to go around another topper of your choice.
Another alternative with the remaining wire is to allow it to spiral down the middle of the cage.

Step 7
Adding Branches to the Full Circle Cage (for table top)
The tree can be made with the front (cutouts) and back (solid) or with the front alone.
To use the front design alone, round the top edge of the branch with your fingers. Use tape or glue along the top edge to adhere it to the wire on the cage.
If using both front and back designs, attach the two together with tape or glue to form a hinge at the top and drape over the wire of the cage.
You will use three on the bottom layer, two on the upper layer, and the tree topper with the branches attached (see Step 5) will sit on the very top or your choice of a tree topper can be used.

Alternative Hanging Wall Tree
Cut the branches (you will not need the tree topper)
3 top branches for the top of the tree. Follow these instructions:
5 branches to cover the back (2 on the 2nd layer and 3 on the bottom layer.
4 branches to cover the front top layer.
6 branches to cover the bottom layer.
The branches will be cut and hung the same as in step 7 above.
Step 1
Making the top of the tree (without the tree topper)

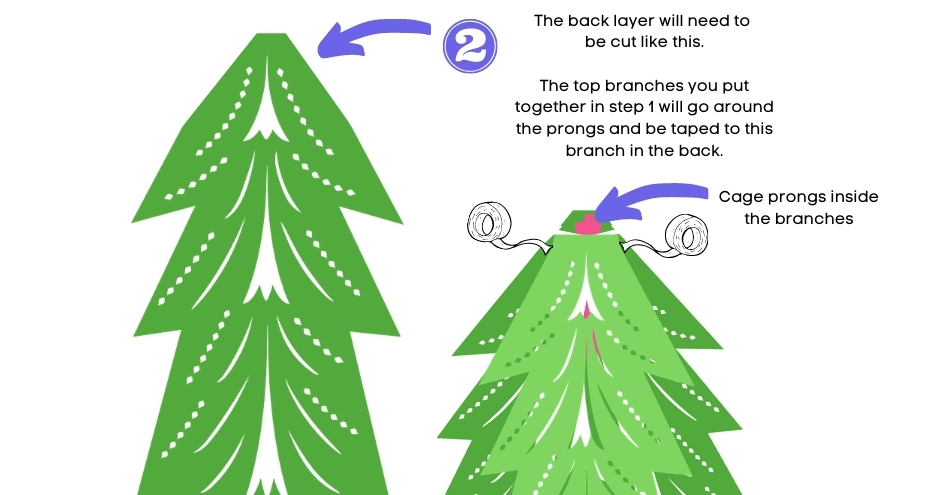
Step 2
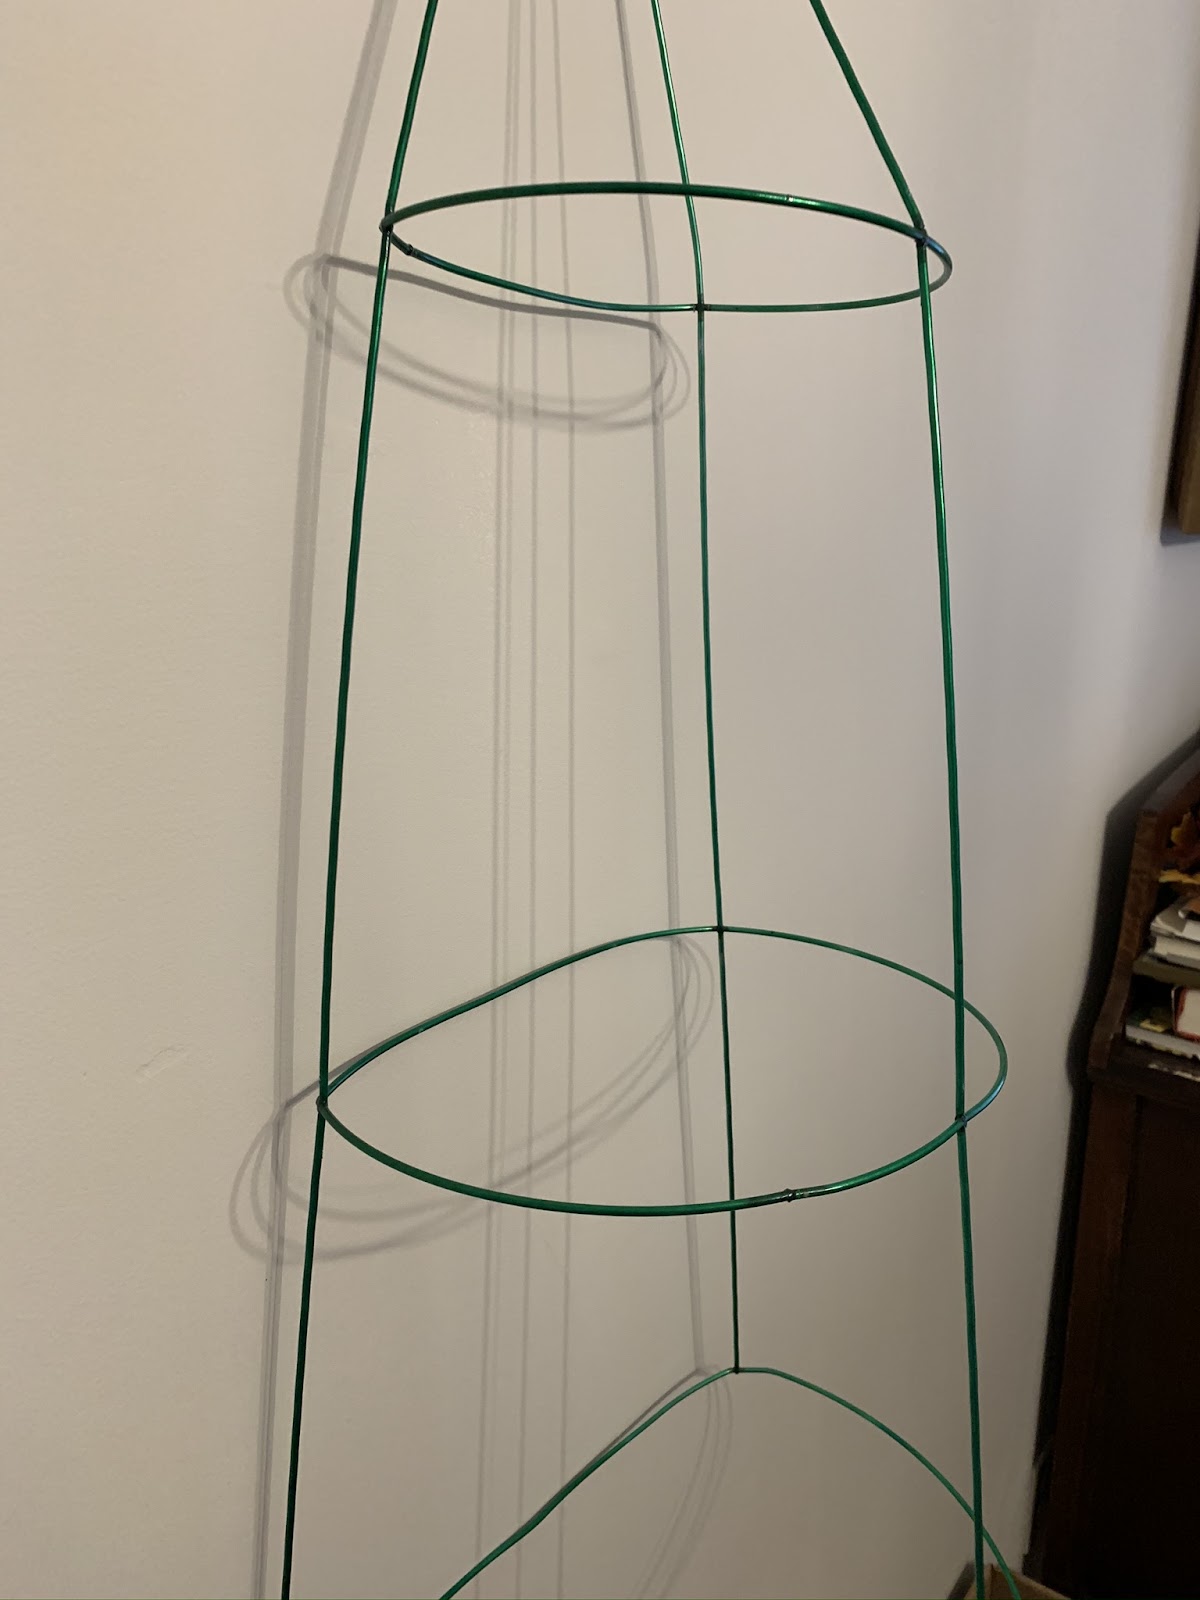
Prepare the Cage
Bend one side of the tomato cage wires inward will pull out to flatten the wire that will go against the wall. Do this for each layer. Slightly pull the top three prongs forward so the tree will fall in a line from top to bottom.
Step 3
Wrap with the fairy lights (same as above)
Step 4
Attach the top layer and work your way down
Use the extra pieces to cover any wire showing

Step 5
Attach a topper (your choice or make one of the tree toppers in the bundle)
Want more Free Christmas Craft SVGs? Check out this post:
Christmas In July Free Craft Series
Don’t forget to PIN it now for Later: