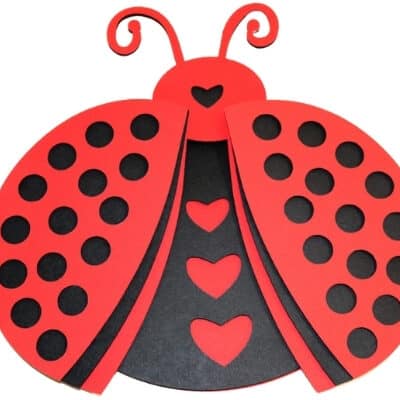
Layered SVG files provide users with a unique and creative way to design and create custom designs using their cutting machines. In this step-by-step guide, we will show you how to turn a multi-layered SVG ladybug into a 3D project using your Cricut or Silhouette machine. This project is perfect for those who want to take their layered SVG designs to the next level and create a unique, three-dimensional piece of art.
Required Supplies:
- Cricut or Silhouette machine
- Ladybug SVG
- Cardstock or paper
- Scissors
- Foam strips preferably with adhesive
- Foam adhesive tape
Estimated Duration: This project will take approximately 1-2 hours to complete, depending on your level of experience and the complexity of your design.
Step 1: Open the Ladybug SVG ladybug file in your design software and cut each layer out of cardstock or paper using your Cricut or Silhouette machine.
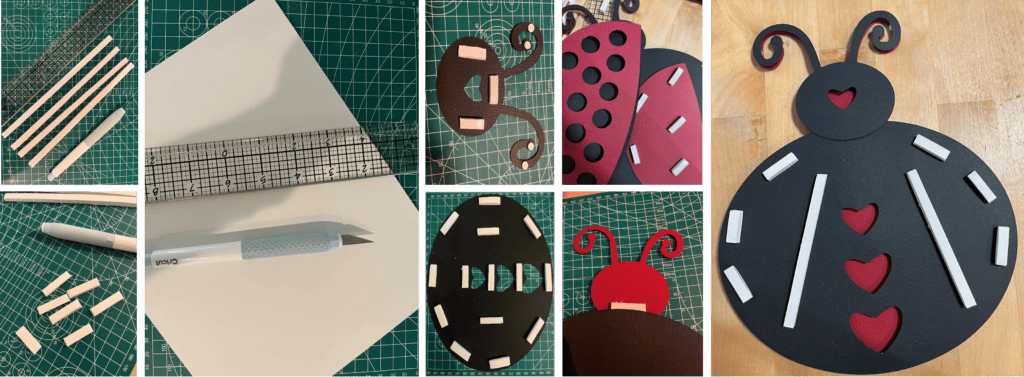
Step 2: Cut appropriately sized pieces of the foam adhesive strips.
Step 3: Apply adhesive to the back of each layer of the ladybug, starting with the bottom layer and working your way up to the top layer.

-
Save
Step 4: Use foam adhesive tape to add depth and dimension to the design by placing it between the layers of the ladybug.
Step 5: Continue to add layers and foam adhesive tape until your ladybug is fully assembled and has a 3D effect.
Step 6: Your 3D ladybug project is complete!
The process of turning a multi-layered SVG file into a 3D project is not limited to ladybug designs. You can use these same steps to create any 3D project from a multi-layered SVG file, such as flowers, animals, or even abstract designs. The key is to carefully cut out each layer of the design, apply adhesive to the back, and use foam adhesive tape to add depth and dimension. With these techniques, you can take your layered SVG designs to the next level and create stunning, three-dimensional pieces of art that are sure to impress.
Complementary Files:
Happy Crafting!


