One dad’s day gift that he will never forget is this fun vinyl decal on a glass mug. This is so easy to make and apply, so don’t be afraid to give it a try! Just follow these step-by-step instructions for how to make your own father’s day gift with the free SVG to make the vinyl decal.
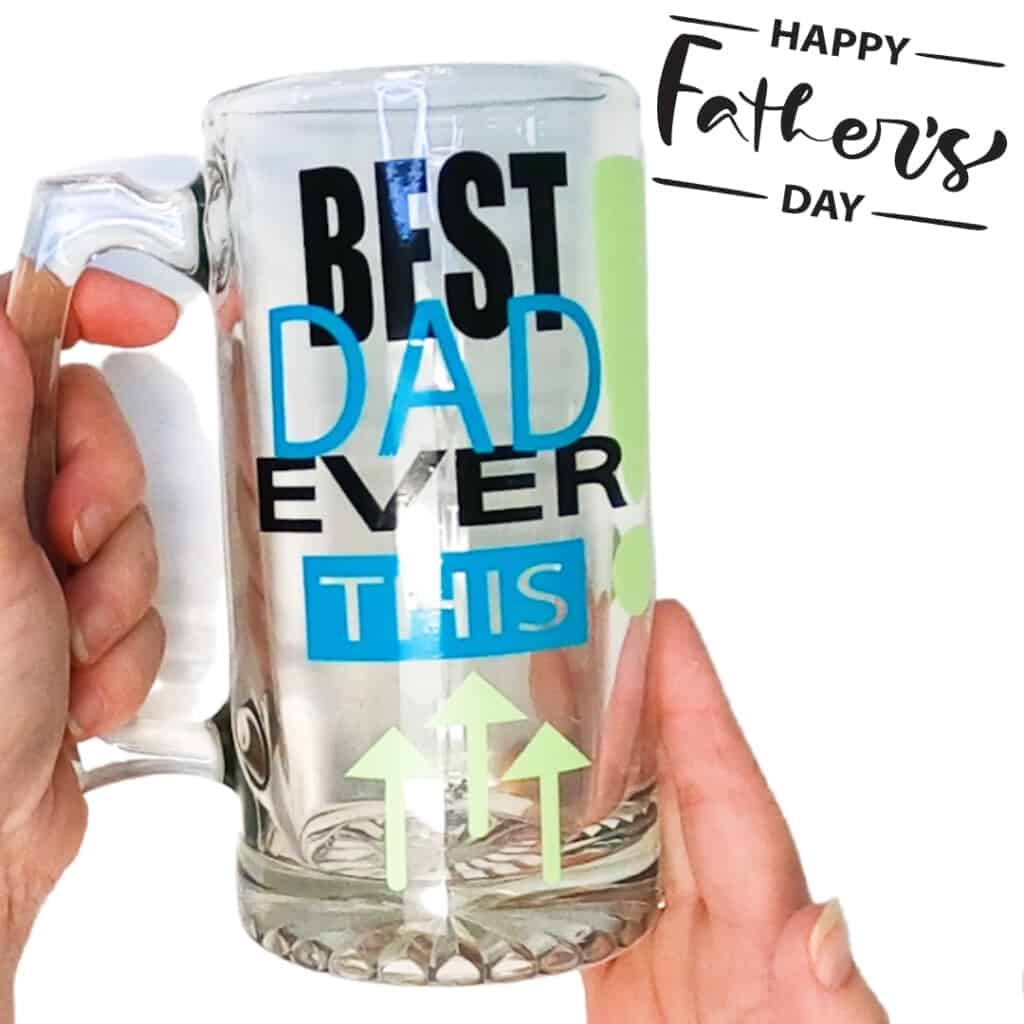
It always seems to be so hard to get something for Dad for Father’s Day. I know that he will appreciate the fact that you took the time to make him something special to let him know you think he is the Best Dad Ever!
This video will show you how easy it is to upload the Free SVG in Design Space to make and apply the vinyl decal on a glass mug from the Dollar Tree.
Supplies used to Make the Father’s Day Mug
- Permanent Vinyl (Oracle 651)
- Cricut Scraper
- Cricut Machine
- Mat
- Transfer Tape
- Lint Roller
- Alcohol Wipe
- Cricut Weeding Tool
- Dollar Tree Glass Mug
Instructions
The file is already set at 4 inches wide by 6 inches tall to fit the Dollar Tree Beer Mug.

Click on the design and click on ungroup.

Move Best Dad Ever over and click on ungroup.

Select the exclamation point and the arrows and click on Attach. They will then be all attached as shown on the layer panel to the right.

- Select all the letters left to right in Best and then Attach
- Select all the letters left to right in Dad and then Attach
- Select all the letters left to right in Ever and then Attach
These are all done separately so you can layer them on the transfer paper. I noticed that if you did not select them left to right, then they will be backwards on your mat. Click on Make It.

Now you see that you have 3 mats and all the words are going to cut properly on your vinyl. Click continue.

Select premium vinyl and set pressure to More. Then load and cut your 3 mats.
Cut and Weed the pieces leaving the design on the backing.
Prepare your Mug by wiping it down with the alcohol wipe. Set it aside to dry.
Remove the backing off a piece of transfer tape that is cut 5 by 7 inches. Lay it down sticky side up.
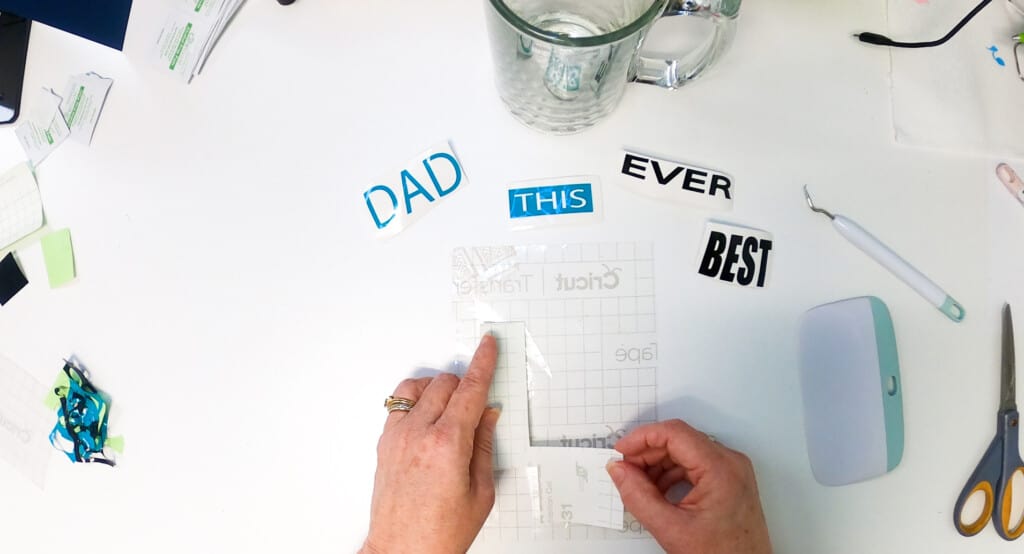
Place the exclamation point and arrows down on the tape first and burnish it to stick to the transfer tape. This process is easier to follow along in the video above.
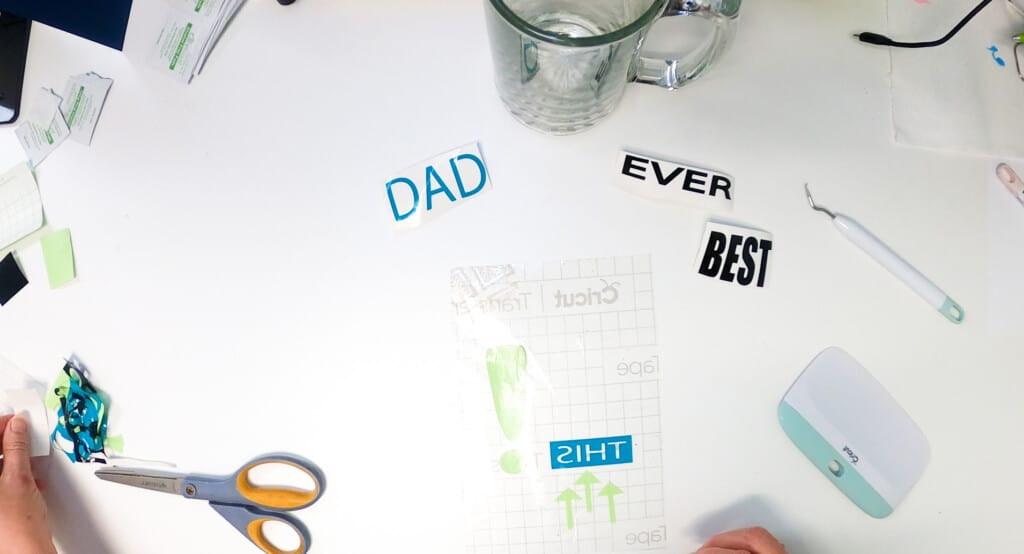
Apply “This” either above or below the arrows. Whichever you prefer.
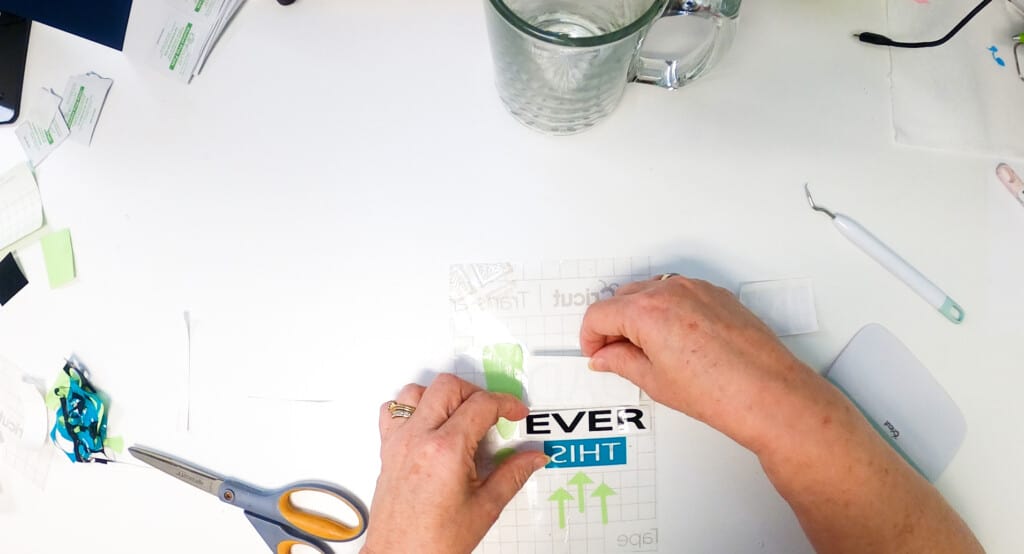
Then apply the “DAD” so that it will overlap the “Ever” by about 1/4 inch. Place the “Ever” down for judgment but don’t apply it to the transfer tape until the “DAD” is down first.
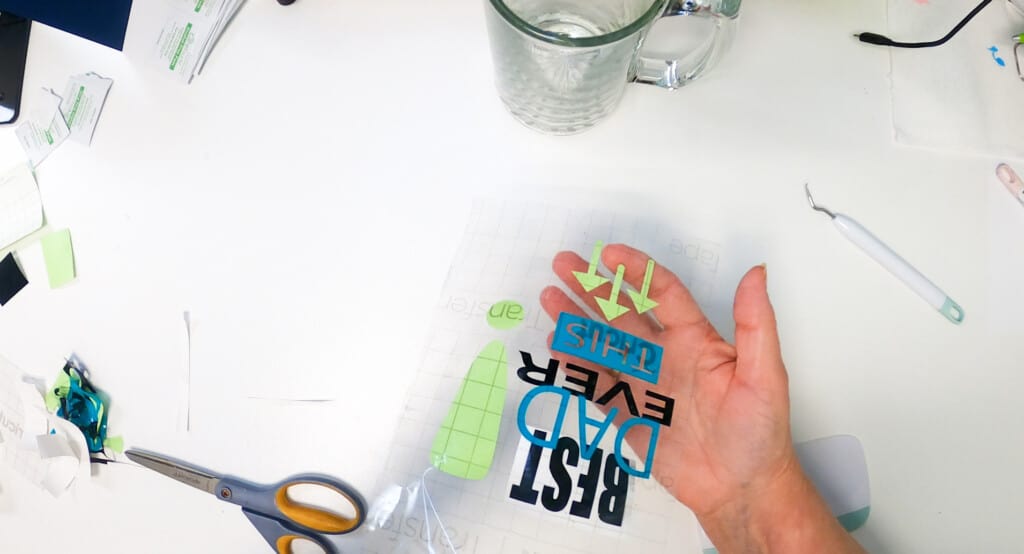
Then apply “EVER” slightly over the “DAD”. Turn the transfer sheet over to see how it will look before you burnish it down.
Repeat the same for adding “BEST” over “DAD”.
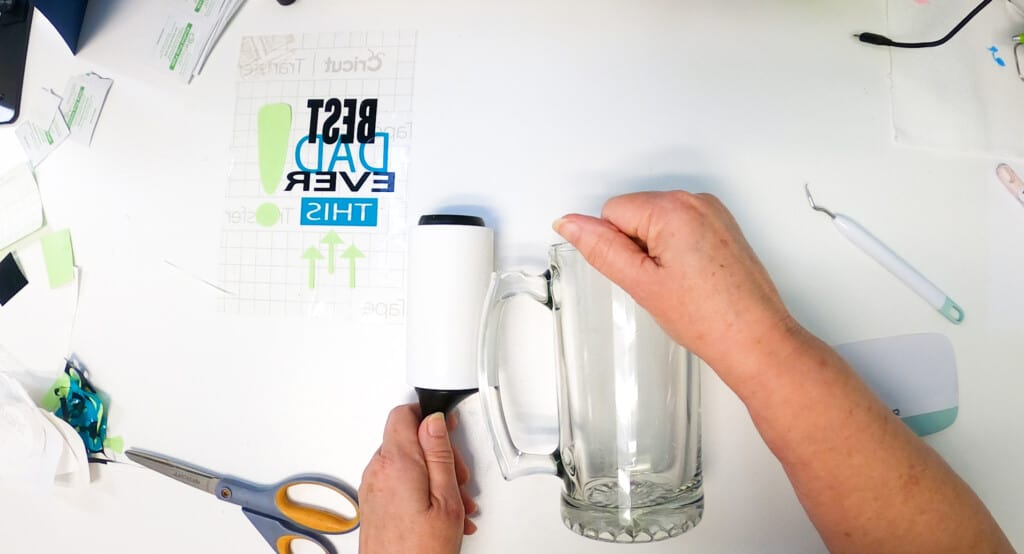
Lay your Mug down with the top of the glass facing away from you. If your dad is right handed, lay the mug with the handle on the left. If he is left handed, lay the handle to the right. That way when he tips his mug to drink, the arrows will be pointing up at him! Use a Lint Roller to hold the handle and stop it from rolling. It’s easier to apply the transfer tape to the mug this way.
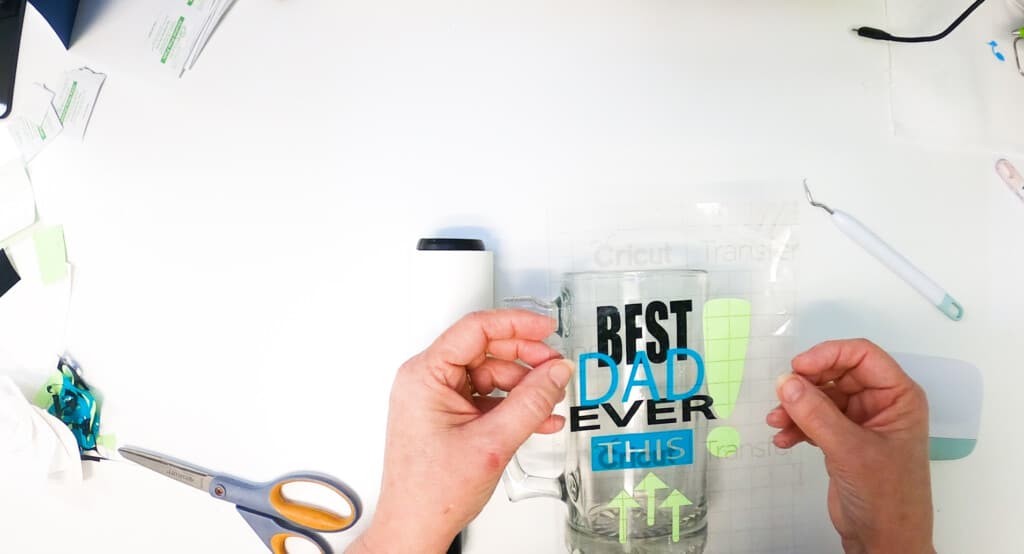
Apply the transfer tape to the mug and use the scraper tool to burnish the vinyl onto the mug. Then slowly and carefully peel back the transfer tape. Make sure all the vinyl sticks to the mug. If not, then lay transfer tape back down and burnish some more.
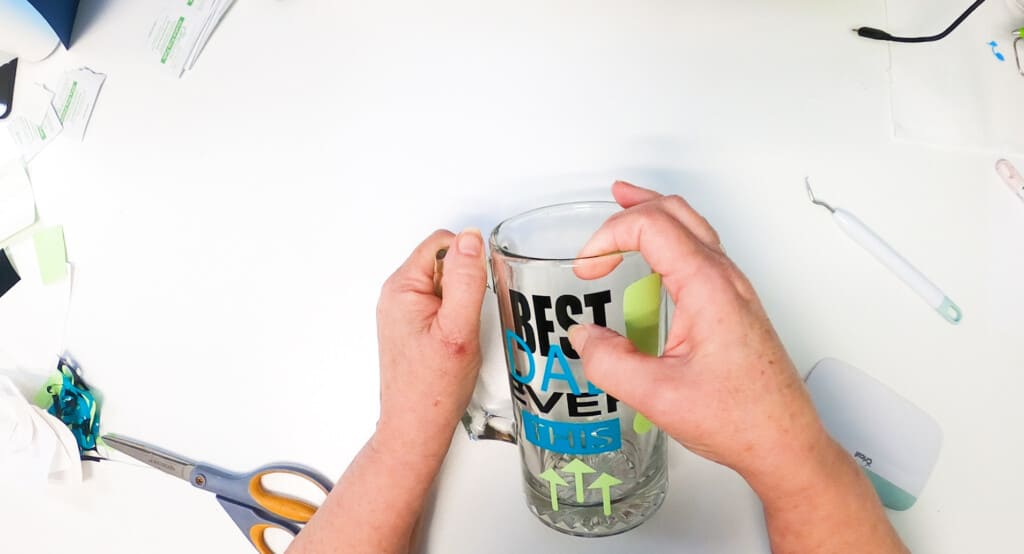
Remove any bubbles with your fingers by slowly rubbing them out towards the side. Ensure the vinyl is secured to the glass at the same time.
Let the glass set for 24 – 72 hours to give the vinyl time to adhere to the glass. DO NOT PLACE in the dishwasher. Gently WASH BY HAND! This will make the vinyl last longer. You can always replace the vinyl if it comes off over time.
I hope you enjoyed making this and I would love to see it in our Facebook Group! Be sure to take a second to post it there or on our page too!

Leave a Reply