Are you ready to bring your designs to life in a whole new dimension? Brace yourself for an exhilarating adventure into the captivating world of 3D projects with your beloved Cricut machine. As someone who has embarked on this creative journey, I understand the excitement and curiosity that comes with exploring new techniques. In this blog post, we’ll dive into the realm of three-dimensional creations and unlock the hidden potential of your Cricut machine. So, grab your materials, ignite your imagination, and let’s take your designs to the next level!
The first time I delved into the realm of 3D projects with my Cricut machine was when I wanted to create a personalized gift for a friend who loved gardening. Using cardstock, I crafted a beautiful flower pot complete with intricate petals and a personalized message. As I assembled the pieces and witnessed the flower pot come to life, I felt a sense of accomplishment and pure joy. Seeing my friend’s reaction when she received the gift was priceless. It was a moment that sparked my passion for 3D projects and inspired me to explore even more creative possibilities.
Get ready to add depth and excitement to your designs as we delve into the world of 3D projects with your Cricut machine.
Here’s how you can master this game-changing trick:
- Selecting the Right Materials: Explore the range of materials suitable for 3D projects with your Cricut machine. From cardstock and foam sheets to chipboard and fabric, choose materials that provide the desired structural integrity and flexibility for your creations.
- Designing in the Cricut Design Space: Let your imagination soar as you design your 3D projects in the Cricut Design Space. Explore the library of pre-made 3D project templates or create your own using various shapes, patterns, and textures. Customize your designs to reflect your unique style and project requirements.
- Assembling the 3D Project: Follow the step-by-step instructions provided by Cricut to assemble your 3D project. Take your time and enjoy the process of bringing your design to life. Experiment with different adhesives and techniques to ensure a sturdy and seamless construction.
- Adding Embellishments: Elevate your 3D projects by incorporating embellishments and decorative elements. From paper flowers and ribbons to sequins and beads, let your creativity flourish as you add that extra touch of flair and personality to your creations.
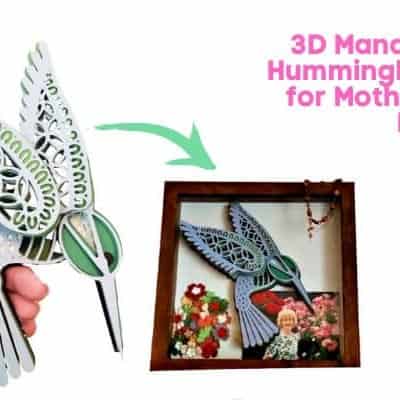
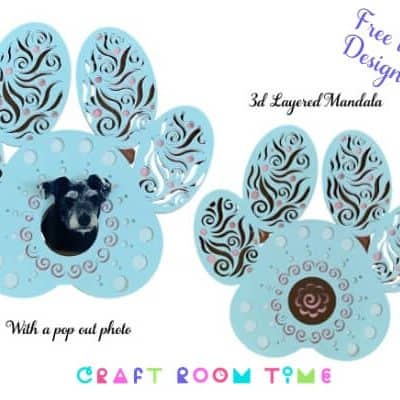
- Exploring Project Ideas: Get inspired by a variety of 3D project ideas that showcase the versatility of your Cricut machine. Create stunning home decor pieces, intricate paper sculptures, party decorations, or even personalized gift boxes. The possibilities are endless, limited only by your imagination.
Another fun project idea could be designing a personalized shadow box for a friend’s wedding or anniversary. Put your Cricut machine to work crafting intricate paper cutouts representing significant moments from their journey together. As you place each element in the shadow box, imagine you are creating a visual story that captures their love and cherished memories. Who wouldn’t love such an imaginative, creative and personal representation of such a significant moment in their lives!
Congratulations on unlocking the extraordinary world of 3D projects with your Cricut machine! By mastering this game-changing trick, you now have the ability to add depth, dimension, and a whole new level of creativity to your designs.
But our creative journey doesn’t end here! In our next blog post, we’ll explore the captivating technique of print then cut with your Cricut machine. Get ready to take your designs to a whole new level of detail and intricacy. So, stay tuned and let your imagination continue to soar!
Happy Crafting!