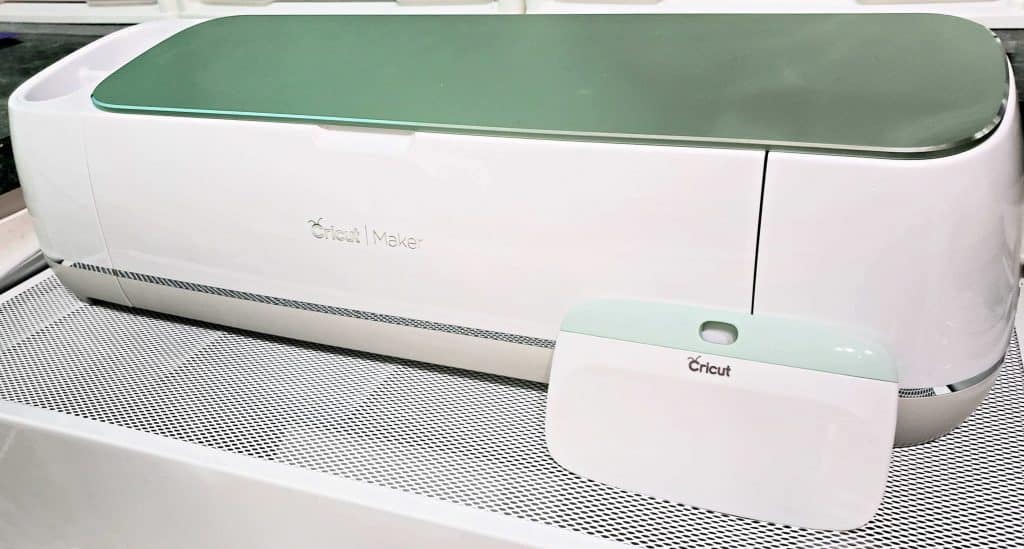
Getting a new Cricut cutting machine is so exciting! So many things you can make! But what happens when you get the box and suddenly get that overwhelmed feeling of “what do I do next?” I’m sharing this experience because I too had the same overwhelm and once I started, it wasn’t so bad. So here you go, Cricut for Beginners Everything You Need to Know to get started!
Cricut For Beginners Everything You Need to Know
step 1: what’s in the box
- Power Cord
- USB Cord (if you are not using Bluetooth for the Maker)
- Instruction booklet
- Blade and Housing (already installed on the machine)
- Accessory Clamp (already installed on the machine)
- Additional accessories for a small project to learn with
To use the Bluetooth on the Maker or the Joy, simply turn on the Maker and your computer or other device and and you will see the available Circut or Maker option to select and pair with code 0000.
The Circut Explore does not have Bluetooth so you will need to connect it to your device using the USB cable provided.
Step 2: Download Design Space
Log into Cricut Design Space. This is what you will see…
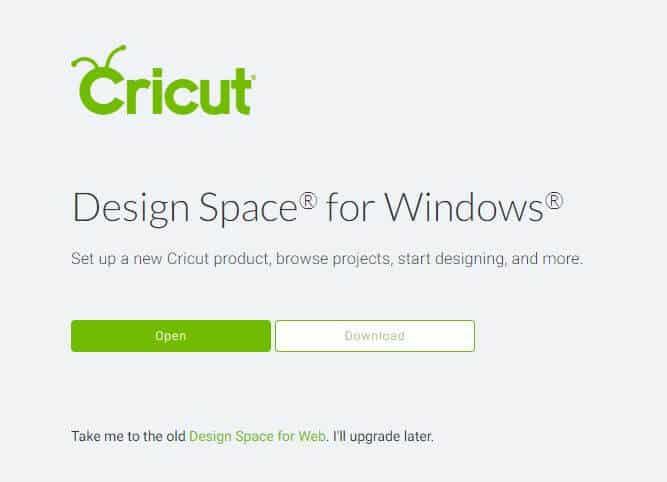
Go ahead and click on Open. If you have an account already, installation will begin, but if you don’t then you will be prompted to select the machine you are setting up, fill out the information and click on “Create a Cricut ID”. Once it is set up, plug in your machine to the computer using the USB cable and it will continue to download the software.
Want a free eBook of this information so that you can download and print to have handy? Just sign up and it will be delivered to you after you confirm your email!
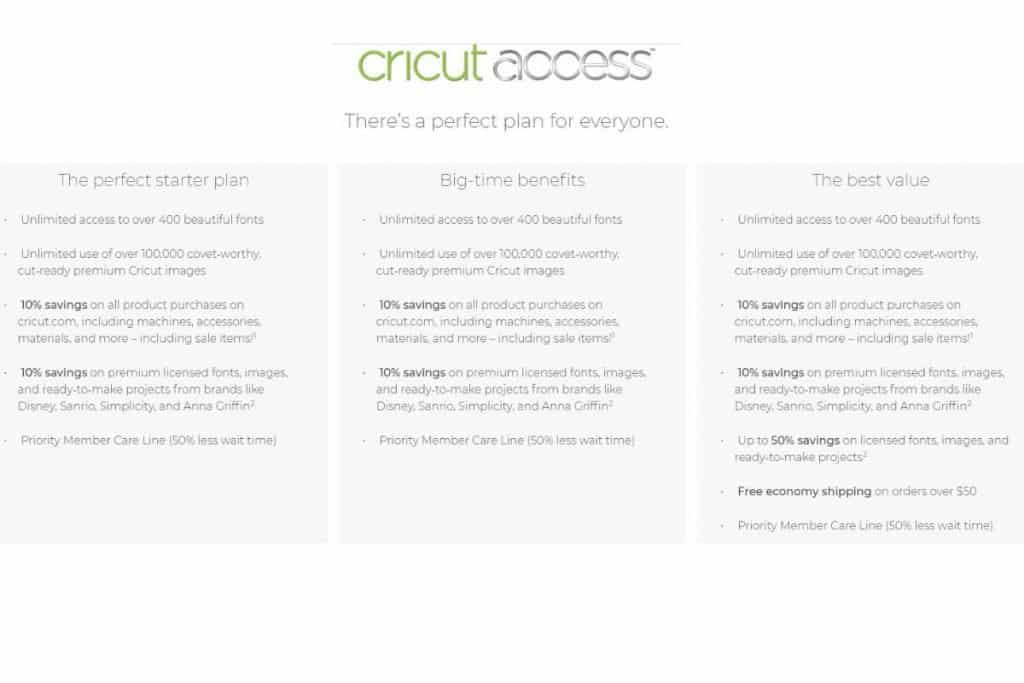
Step 3: Design Space and Access Membership
You will see the little Cricut Icon on your desktop and you can click on that to open the program.
Design Space is the program that Cricut uses and it has projects and files pre-loaded for you to use.
You will see that some are free and some are paid. If you join Access, you will get 3 different options to choose from that are well worth the subscription price. If you have shopped for SVGs you will find that they can range in price from $1 to $10 or more for just one file!
Here are the options available for you to choose from:
Cricut Access Membership Plans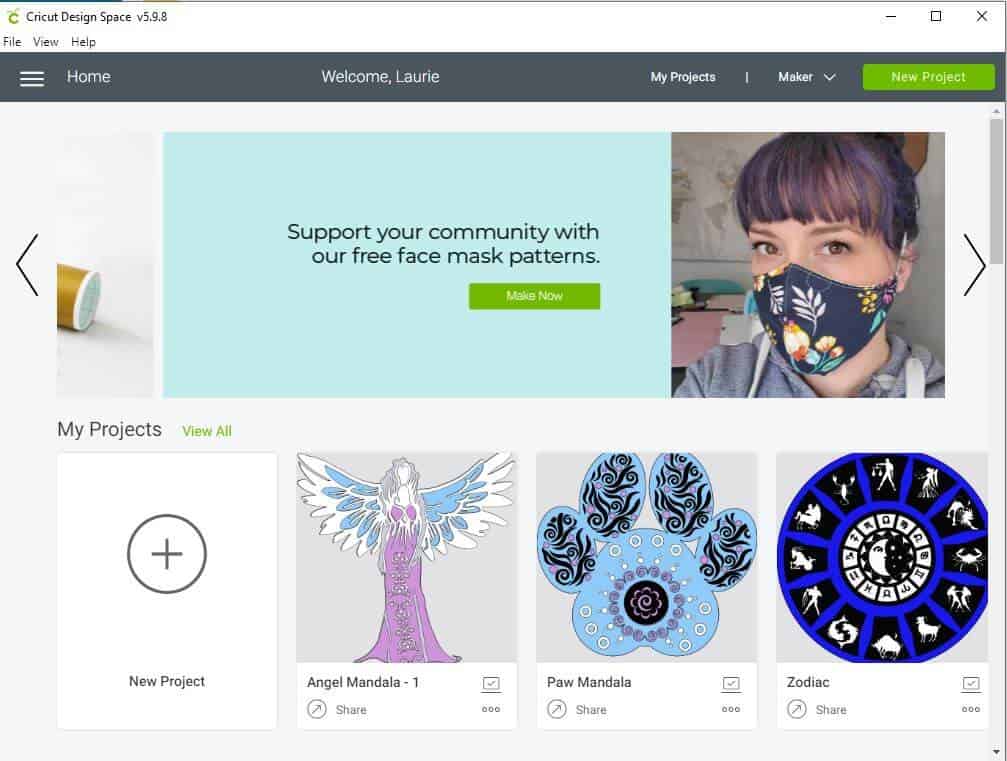
Step 4: The design space program
Once you open the program, you will see the screen above. If you have projects already saved, you will see the most recent ones next to New Project. I have 3 showing in mine. The Angel, the Paw Print and the Zodia. The first two are shared files so you can use them! More on that later.
There are a few things you can do in this window…
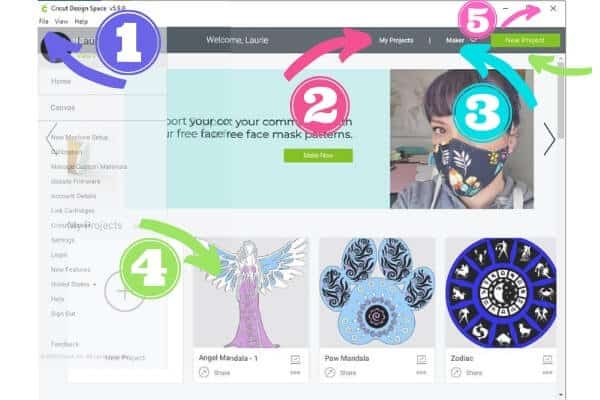
- Click on file and a drop down menu comes up with options
- Click on My Projects and a window will open showing all your saved projects
- Click on the drop down to select your machine
- Click on projects that you can see below or click on New Project in lower left or upper right corner
- To close the program, click on the x in the upper right corner. Another window will open so you can just click on Quit. Remember to save first!
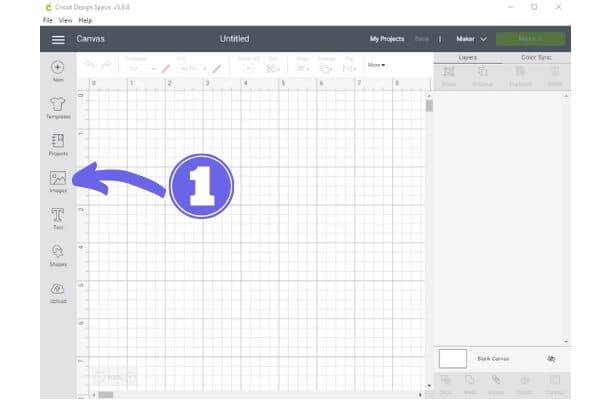
Step 5: Create a new project
Here is where the fun starts! Because this is the beginner steps, I’m going to show you how to use Images already available and free in Design Space.
Go ahead and click on Images.
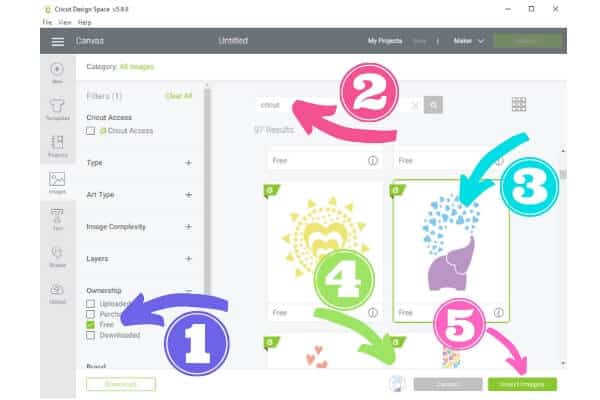
- Click on the + sign next to Ownership to open the options. Click on Free.
- You can also use the search bar to type in and enter to bring up items. Type in Elephant.
- You will see the little elephants with the hearts. Click on that image.
- You can see all that you have selected at the bottom next to the cancel button
- Click on Insert Images Button
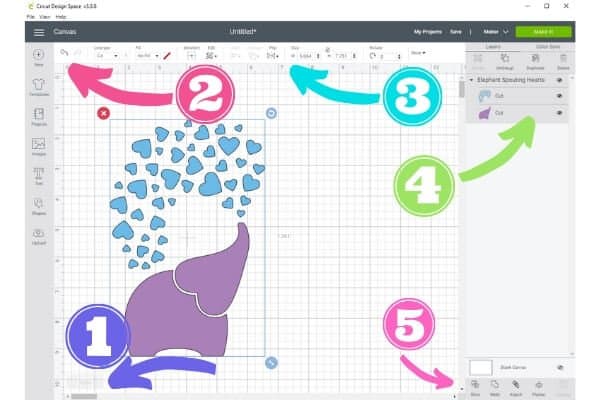
Step 6: Designing
Now we need to know what we can do in the design window. There are a lot of things you can do here so I will point them out too you 5 at a time 😊
- It’s hard to see but in the lower left corner is the zoom tool. + makes the imagee bigger to see and – makes the image smaller to see
- The little arrow up in the upper left corner is the UNDO button. You can hit it more than once and it will continue to undo your last steps. You will use this a lot! You can also hit the Ctrl and Z buttons at the same time to undo you last steps
- That top bar tells you all about your image (more to come on this in the next photo
- On the Right you will see a menu that tells you all about each layer in your project. More to come on this
- Down in the lower right bottom is selections of what you can do to manipulate the image. More to come on this.
Step 7: Save and SAve Often!
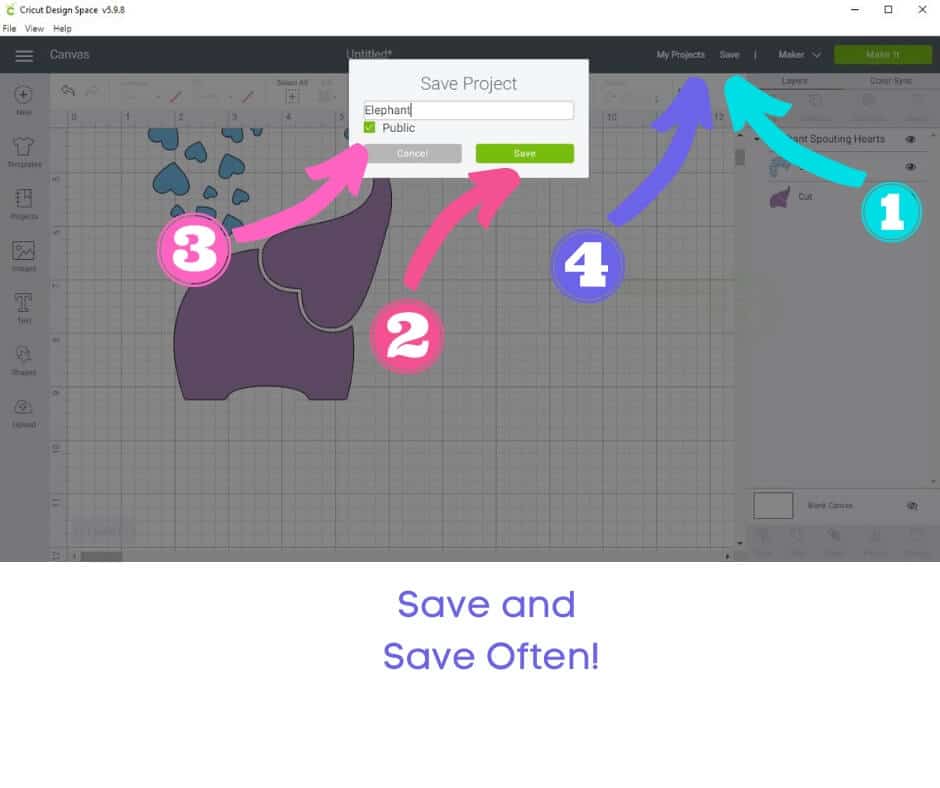
- Click on Save
- Type in the Name You want
- Check Public if you want to be able to access it from another computer. This does not share it with anyone else.
- You can then find it again under My Projects laterr
step 8: Templates
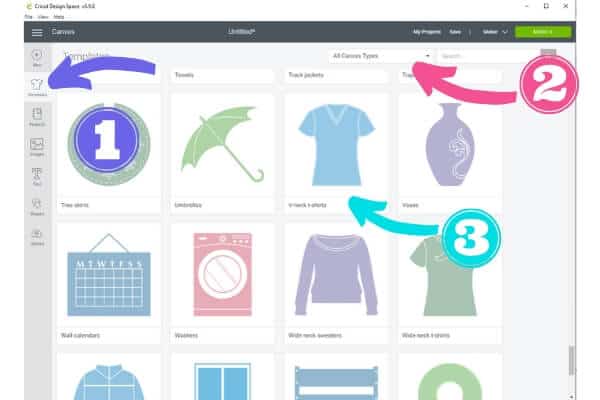
- Click on Templates and this opens up. It contains items that you may want to place your design on and will give you an idea of how big it needs to be to fit
- You can select different “canvas” types or search to see if they have something similar to what you want to put your item on. This is not necessary if you are just cutting paper or doing a print then cut
- Select an item and click on it. Find or search for the V neck t-shirt and click on it
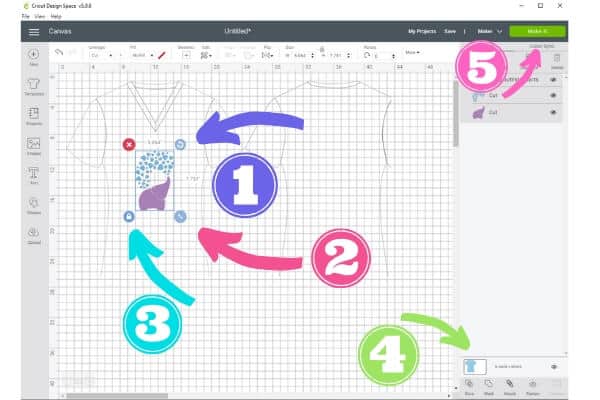
- Drag the image over to the T-shirt template. You can use the Rotate tool in the top right of the image to move it around in a circle
- You can make the image bigger (proportionately) by clicking on the two arrows in the lower right of the image and drag it
- You can click on the lock in the lower left corner of the image and then make the image bigger and/or smaller, wider and/or narrower (skew)
- This is where you can click on the eyeball to hide the T-Shirt Template. Any time you click on an eyeball that image will be hidden. Just click on the eyeball again to un-hide it
- When you are happy, click on Make It in the upper right corner
Step 9: the top menu and layer menu
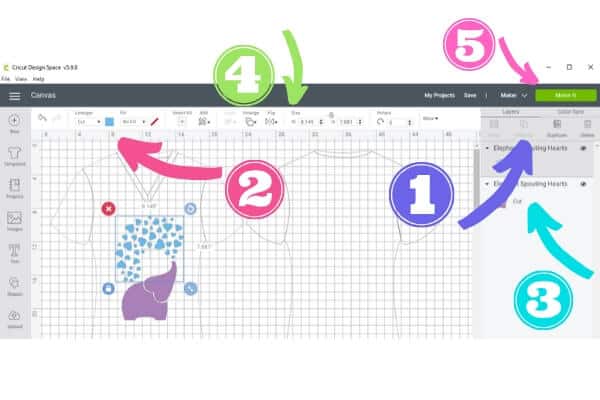
- Most items that come in have different colors and are grouped. You will want to ungroup them if you want to change the different sections. Once I clicked on ungroup, you can see that the hearts can now be selected and manipulated without effecting the elephant.
- The two areas at the top left are where you select the linetype which can be a Cut, Draw, Score, Engrave, Deboss, Wave, or Perf. For this tutorial we are doing a Cut.
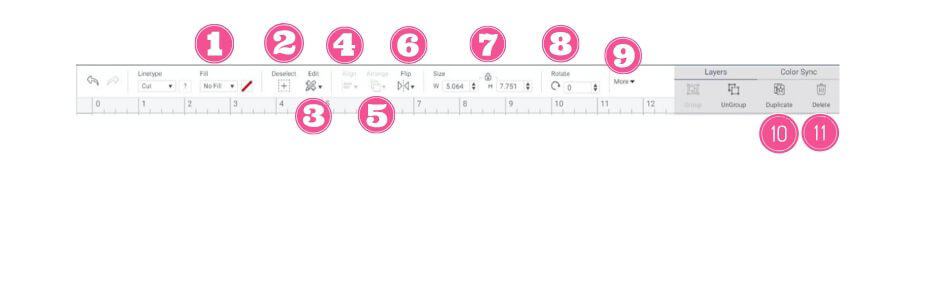
- Then comes the Fill. You can either do a No fill (for cuts) or a Print (for Print and Cut).
- After that is the Select (Deselect) All and this will select all images so you can move, resize, duplicate, delete or group together.
- Edit Allows you to Cut, Copy and Paste.
- You can use the Align features once you have selected more than one image that is not already grouped. You can align them by left, right, top, bottom or center horizontally, vertically or center both ways. You can also distribute horizontally or vertically.
- Arrange allows you to send an image to the back behind another or backward just behind the first image. You can also do the same too move it forward.
- Flip allows you to literally flip the image horizontally or vertically.
- The next boxes show you the size of the image. You can manually change these proportionately with lock or click on lock to skew.
- Rotate lets you move the image around in a circle by a certain degree.
- The more drop down allows you to position the image on the mat using the x for horizontal and the y for vertical.
- Under the Layers Panel you see Group and Ungroup which I discussed above and then you have Duplicate. Select an image and click on duplicate to make a copy.
- Lastly is the delete key. Select an image and click on delete to remove it from your canvas.
Step 10: SAVe Again!!!! (Refer to step 7)
Step 11: Preparing to cut
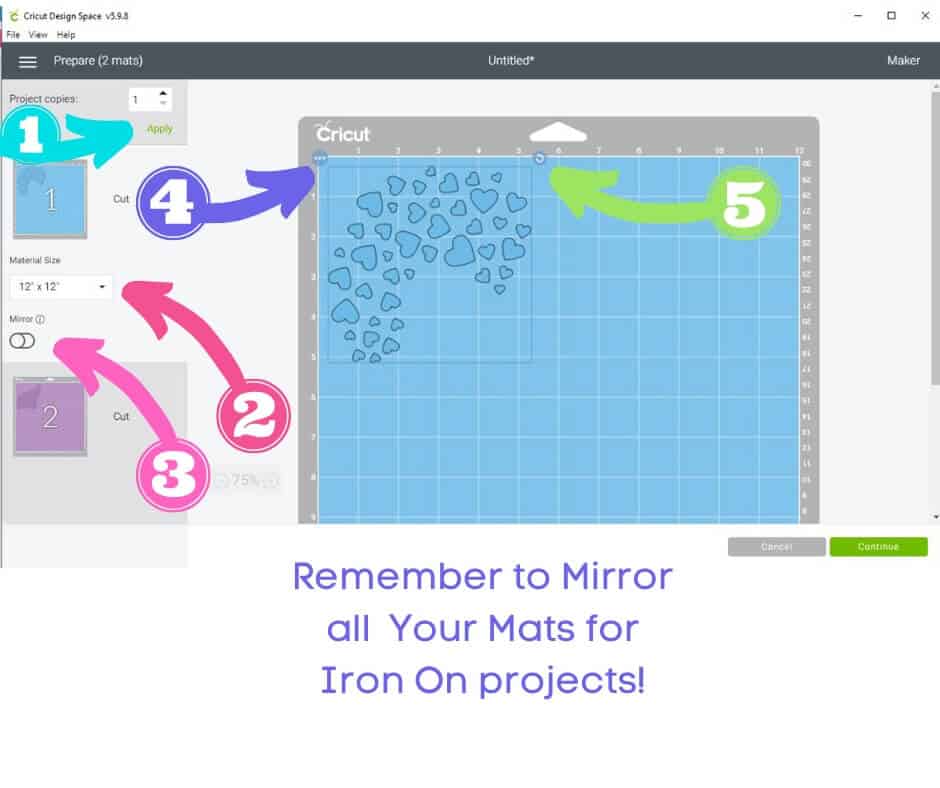
- Select how many copies you want to print of the project. You can always finish and come back or cancel and come back just so you are aware.
- Select your mat size from the drop down menu.
- If you are doing iron-on REMEMBER TO CLICK THIS BUTTON FOR ALL MATS!
- The three little dots allow you to move the image to another mat or hide it so it won’t cut.
- The circle with arrow allows you to rotate the image for better placement.
Step 12: My Projects and Sharing the design with others
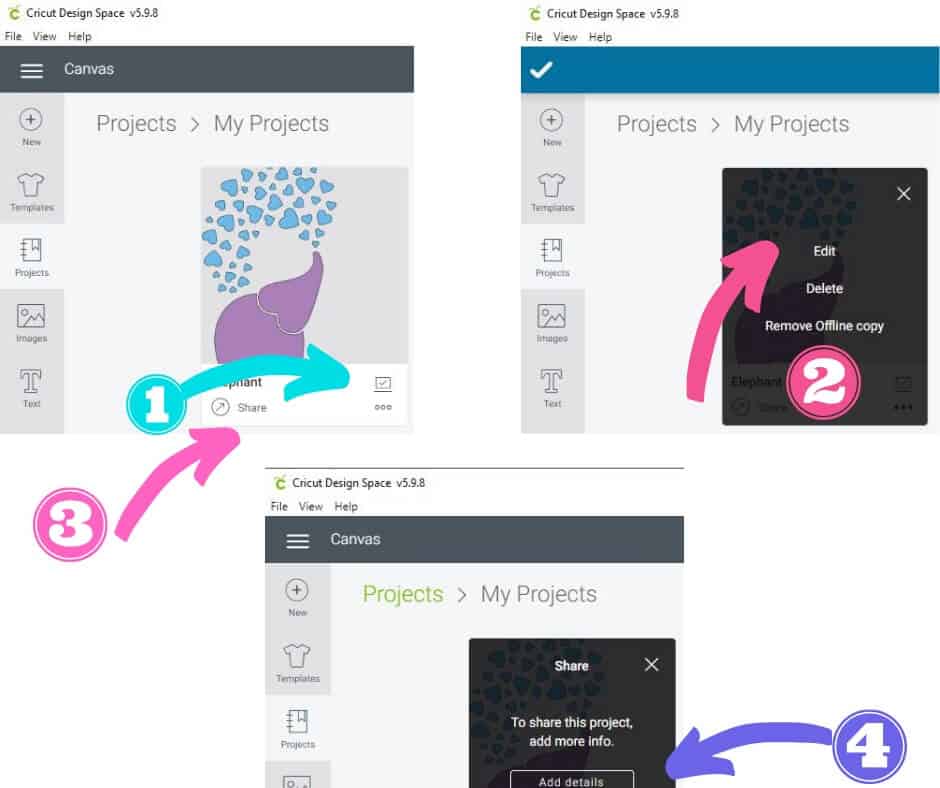
- Once you have gone back to My Projects, you can do a few things with the saved image. First you can click on the three dots
- then select to edit, delete or remove offline copy (if you set it to public before)
- You can click on the share button and a screen will pop up like this. Click on add details.
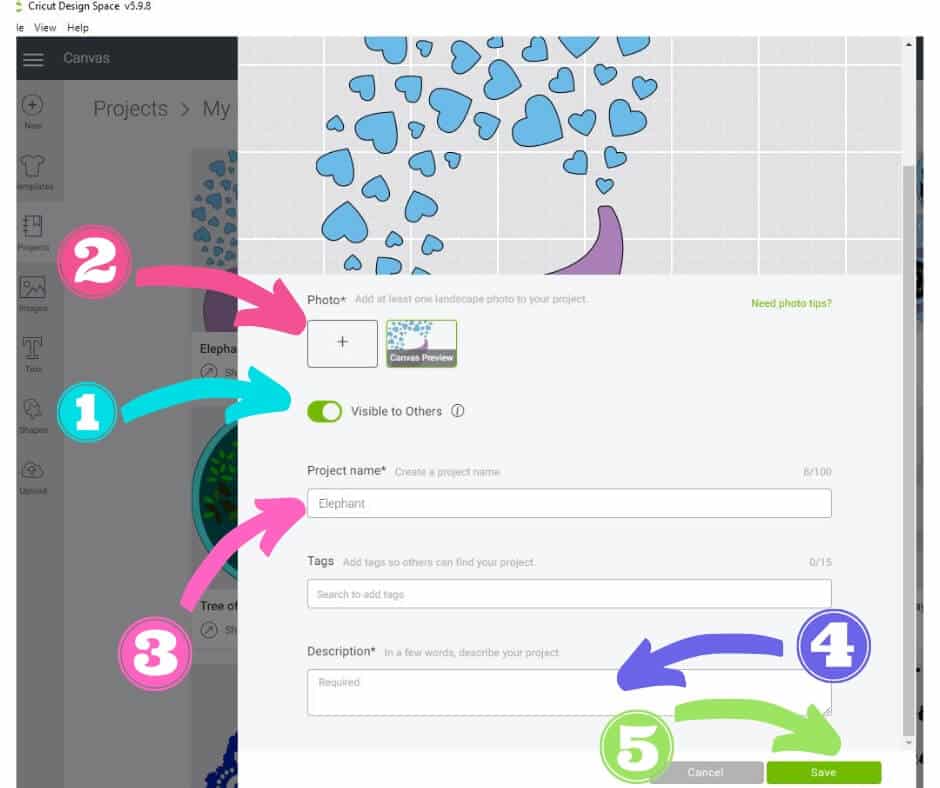
- First make sure it is set to Visible to Others
- You have to upload a photo of your own of what you made, or steps, etc.
- Your project name will appear here but you can change it if you like
- Add a description, steps, etc.
- Save
Conclusion
I hope this tutorial Cricut For Beginners Everything You Need to Know helps you to begin to understand how to make a simple project in Cricut to get over that unfamiliar feeling.
There is so much more this little cutting machine can do! We feature some of them in our other posts as well as on our Youtube Channel. Hope to see you there!
Post a pic of your creation in our Facebook Group Craft Room Time
Want to Learn how to do some tricks in Design Space to create Layered Mandalas? Click here
What else would you like to learn to do with your Cricut? Let me know in the comments.