Third in the series of Craft Room Design and Organization is deciding what craft room furniture, shelving and lighting will be best for your craft room.
Ever worked in an area where it is just too dark to see? What a difference the right lighting can make in your room.
Based on what kind of crafting you do, there are so many options for the furniture that will store all your supplies and lastly the shelving that can give you the benefit of vertical storage.
Here’s a quick recap and links to the series so far in case you need to go back and catch up!
CRAFT ROOM DESIGN AND ORGANIZATION SERIES
Series One: The Art of Color Theory, Color Psychology and Color Choices
Series Two: Prepping and Painting your Room
Wall Shelving
I’ve always considered it important to take advantage of vertical space in rooms. No doubt that you will run out of floor space to put lots of furniture, but look how much you can store in tall shelving that takes up little space!
I also think you can be very creative when it comes to shelving and how you place them around your room.
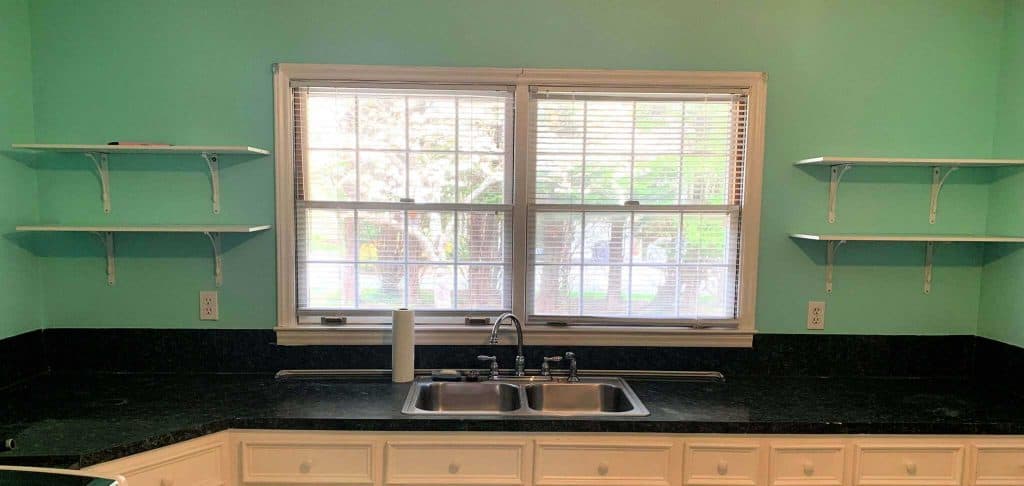
In my new craft room, I have a lot of lower cabinets but had nothing on the walls above. Wasted space. Not anymore! I hung two 75 inch Rubbermaid Shelves on one wall.
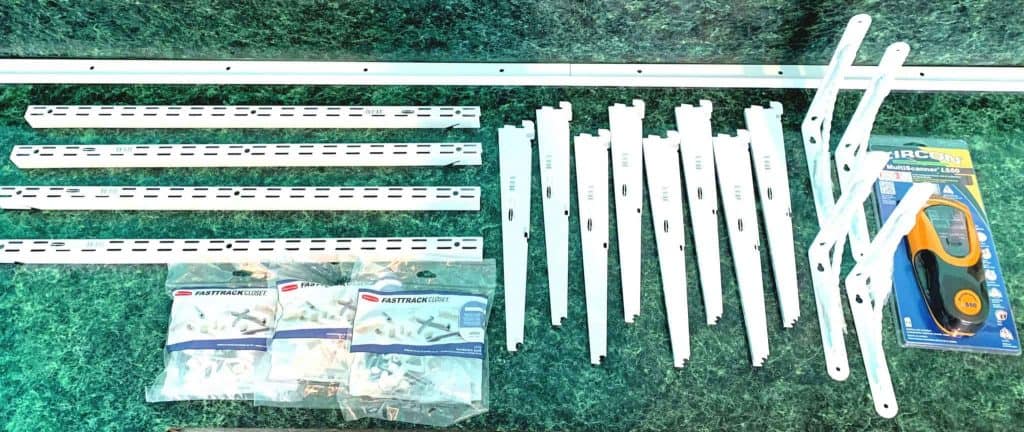
This is a list of what I used to for the shelves (Link is in top two and rest can be found from there) These were all purchased at Lowes:
- Rubbermaid Linen 6-ft L x 12-in D White Wire Shelf
- Rubbermaid FastTrack White Shelving Bracket
- Rubbermaid FastTrack White Shelving Upright
- Rubbermaid HomeFree White Shelving Rail
- Rubbermaid FastTrack Adjustable Hardware Kit
- Zircon 1.5-in Scan Depth Metal and Wood Stud Finder
- Style Selections Steel 9.06-in D x 6.5-in L x 0.98-in W White Decorative Shelf Bracket
You can see the video of how I installed them here:

On my other wall on each side of the window, I hung two shelves that I totally got creative and made them out of two shelving kits.
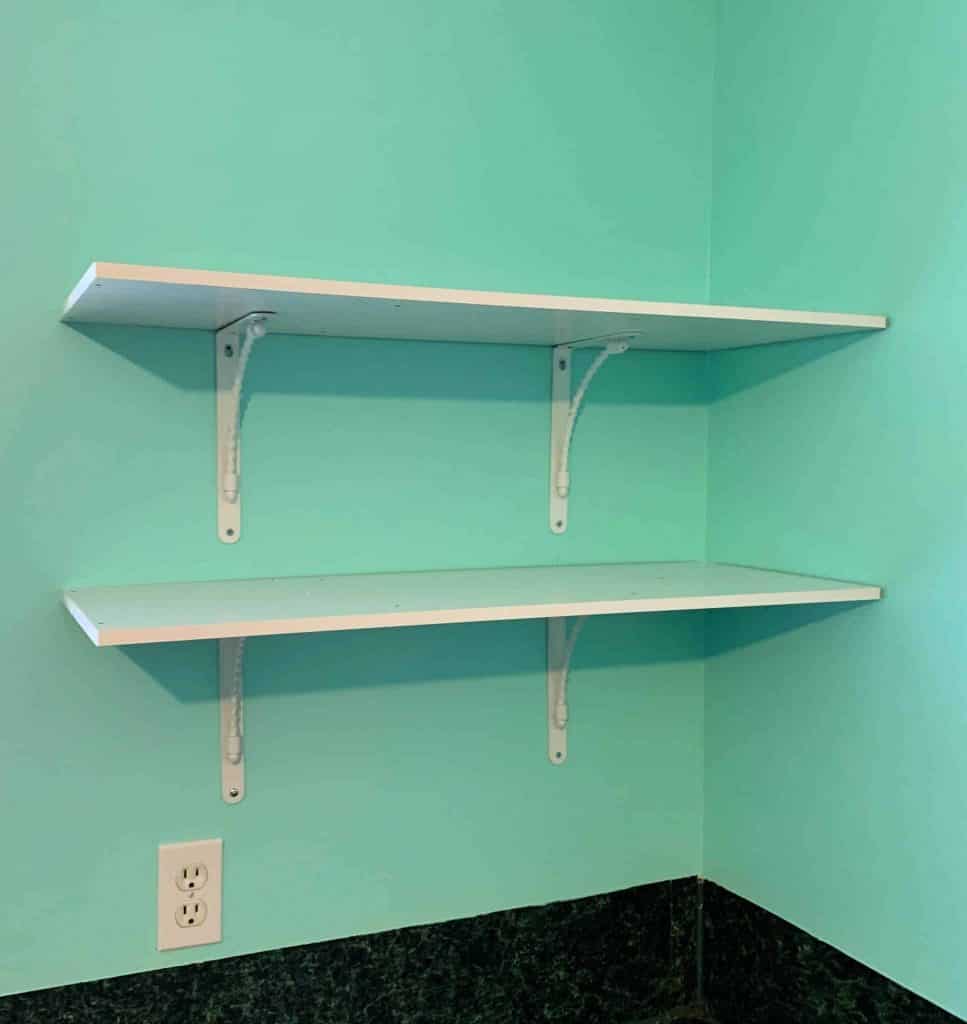
Using the two long white sides of the Closet Maid shelf unit, after I put the wall brackets up, I put them on top and used two little screws to attach the shelves to the top of the brackets for stability.
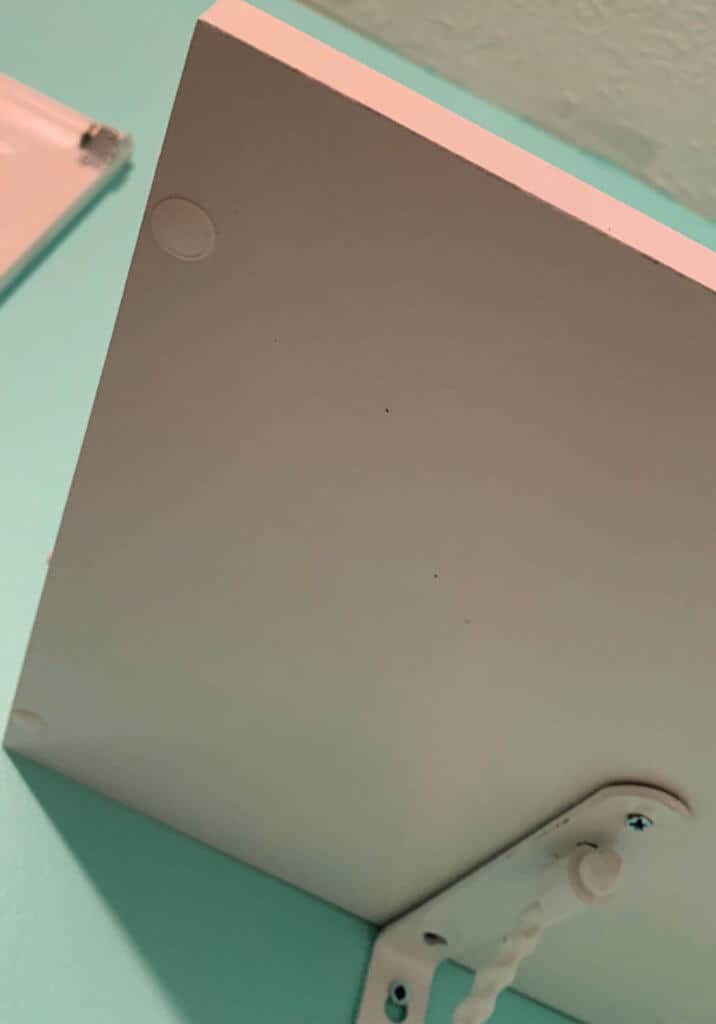
I then took the little caps that came with it and some e600 glue and stuck them in the holes in the bottom of the shelves (where the screws to put the shelf together would have gone). Then I took little pieces of white duct tape and covered the holes on top. Probably didn’t need to do that because items on the shelves will hide them anyways. I was very pleased with the end result.
Here is a link to the shelves I used:

Furniture
This is a bit more of a tricky subject because, I believe, it has a lot to do with what you craft.
For example, if you are a painter, you will need more drawers or trays to put your paints. If you sew, your storage is more for material so drawers and shelves. If you craft with beads, then you will need more jar storage areas so possibly more shelves.
If you are like me, you do a little of everything and therefore need it all!
First start with the measurements of your room. Take out a tape measure, pencil and piece of paper. For every foot, draw it out as an inch on your paper. For example if your room is 8×10 this will work on a regular piece of copy paper. Draw out a line 8 inches long and then one 10 inches long, repeat and connect. Use graph paper if you have some.
Then put in lines for your windows, closet, doors, cutouts, etc. Try to be as accurate as possible by measuring distances from walls twice. Then you have a really good idea of how much space you actually have to work with.
Under Windows
The first thing I consider is what I can put under windows and in the smaller spaces. There are a lot of really good choices for under window storage that will also provide you with a good top to store items like your machines.
This is one of my favorite pieces. They can stack on top of each other and they are on wheels if you need to move them around. They are easy to build and are very sturdy so will hold your typical craft machines on top. The drawers are 15.9″W x 11.8″D x 2.6″H. They hold a lot of stuff!
They come in different sizes.

My next choice and what I have also used is the cube shelves. You can purchase so many different patterned storage boxes to go in them that they can really be quite attractive and hold a lot of different supplies. There are many sizes so there is bound to be a size that will fit below a window.

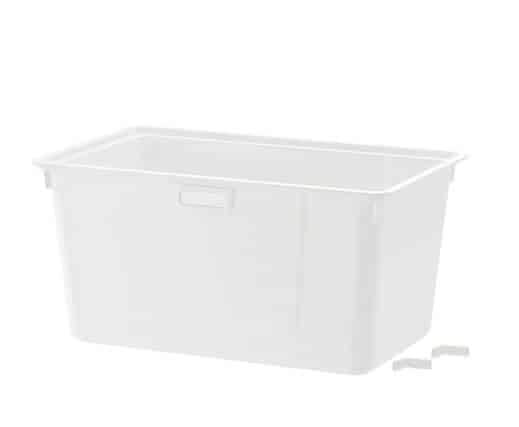
These Iris containers are also a very good choice for paper crafters or even for materials. They are on wheels so you can easily move them around and they have space on top to place your crafting tools. They are pretty sturdy as well. They come in White or Black and various sizes.

Stand Alone Shelving
Next to consider is smaller wall spaces. This is where I would try to find shelves that will fit the area. My preference for shelving is the standard put together shelving that allows for adjustable shelf heights. This can store so many things and those odd size things as well. You can use the cubes or baskets or whatever you like to make them pleasing while hiding all your goodies!
These are standard shelves you can use for some of your lighter items. If you are needing to store heavier items, then be sure to find shelves that will not bend in the middle. Most likely more expensive and made of real wood. I have used these types of shelves my whole crafting career and I am just cautious as to how I distribute the weight on the shelves. Heavier to the sides and lighter in the middle.

These shelves are good for holding different size machines. It makes storage easy, attractive and organized. You can find many different sizes tall and wide. Here is a very standard sized one:

A lot of crafters opt to buy the Kalax units from Ikea as shown here. I am showing you the one with the doors to give you an idea of how versatile these units can be. However, I did not purchase them because in my experience of crafting, I never have the same size supplies that will perfectly fit in cubbies or inserts. So for myself, I prefer adjustable shelves.
Now that you have those areas settled and drawn on your map, time to decide on the rest of the room. This is where you will have more freedom to choose bigger pieces, and taller as needed. One thing I like to figure out first is where my craft table and/or desk will go. Will it be in the middle of the room or will it need to go up against a wall. Take your time researching this item.
Things to consider when choosing your work table:
How much space do you need? Do you need more of a rectangle or will a square workspace work? Will you need to move it about or will it be stationary? I love all my stuff on wheels. That way I can change things around as much as I want.
My crafting table is important to me as I do a lot of different styles of crafting so I need to be able to clear it all of and do something else. Also, my room is not that big so I wanted a table that I could put in the middle of the room but then move it out of the way as needed or use it in another room. So I opted to purchase this
INGATORP table from Ikea:
Product dimensions
Min. length: 25 5/8 ”
Max. length: 48 3/8 ”
Width: 30 3/4 ”
Height: 29 1/2 ”
I like that it has openings to put your legs under the table. Most craft drop leaf tables are on wheels and they operate more like a gateleg where you pull the legs out to support the leaf.
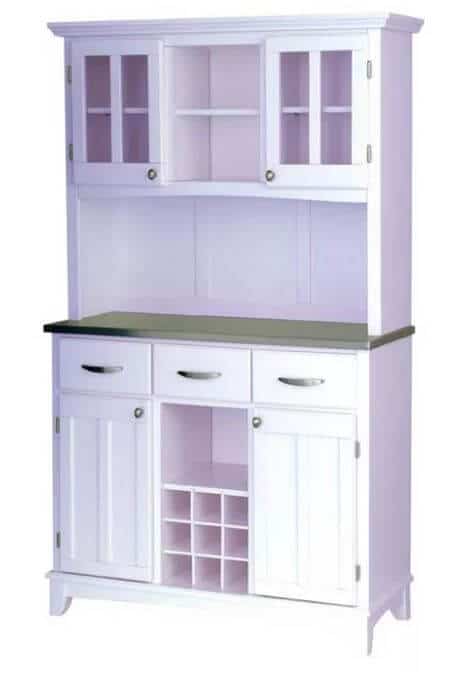
I love to have a large hutch in my room. This allows me to have shelving and drawers with a nice look. I can also display some of my crafting items in it as well.
This is very similar to the one I have and at publication was available at Target:
That really is my process for how I have chosen my craft room furniture in the past. Because our current already had a room full of cabinets as you saw in the video, I really did not need any additional furniture and really only had one area to put storage. I already had the storage drawers I bought at Ikea with the solid drawers and I covered them with contact paper to match my room.
Ikea still sells the Antonius version as you will see below with wire baskets and an insert and now they have the Alg8ot that is also available on wheels and has a shelf. I love mine as it stores a lot and then I also have ample storage on top.
Found Space
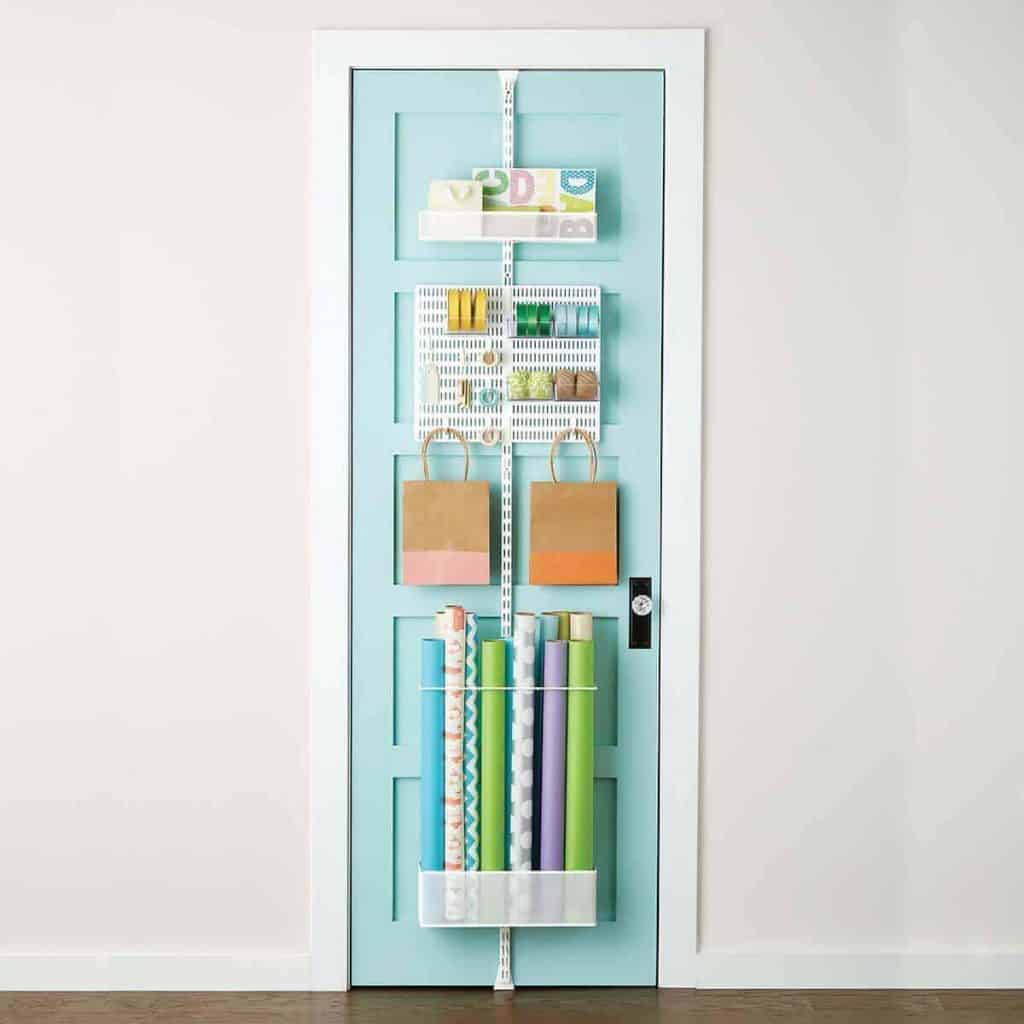
Do not forget you have some extra space on the back of your door!
Take a look at this set up I purchased from the Container Store. When you go to the sight you can actually customize this any way you want.
Lighting
I cannot stand working in a room that has improper lighting. It causes eye strain, you can’t see what you are working on, and if you are like me, you lose things in plain site! Haha. I remember a time when I was weeding out a vinyl sticker and I could not find the dot for the i for the longest time. As soon as I walked out of the room, there it was, plain as day – right on top of my shoe!
Cue the hubby. LOL. We went shopping and found this glorious light fixture.

The lights rotate so you can point them how you want. It is perfect for my room. I have 3 pointing to one side and 3 pointing to the other side. The light is bright but not intrusive. Then I have smaller task lighting such as the OTT light for my small desk area where I do alcohol ink painting, a standard desk lamp for my desk, and then various other lighting for photography and such.


So those are the three things that I consider after painting my craft room. I hope these solutions will work for you or at least help you to figure out what you need to consider for your purchases.
I would love to see some of the pieces you have repurposed for your craft room. Send me a photo or drop a pic in the comments below.
Check out the whole series:
Series One: The Art of Color Theory, Color Psychology and Color Choices
Series Two: Prepping and Painting your Room
Series Three: Choosing your furniture, shelving and lighting
Series Four: Craft Room Organization and Storage Ideas
Series Five: Special consideration for Crafts that require ventilation
Series Six: Organizing your Space
Series Seven: The Art of Keeping a Clean Craft Room
BONUS: Selling your Crafts Online