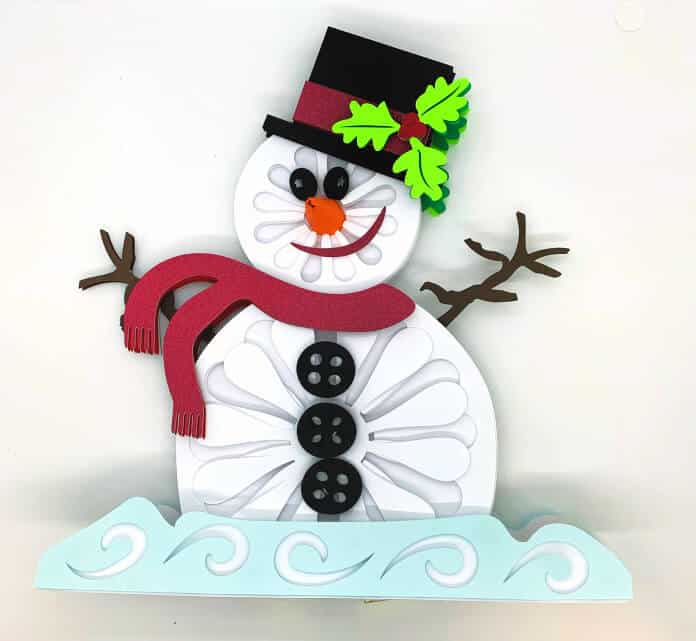
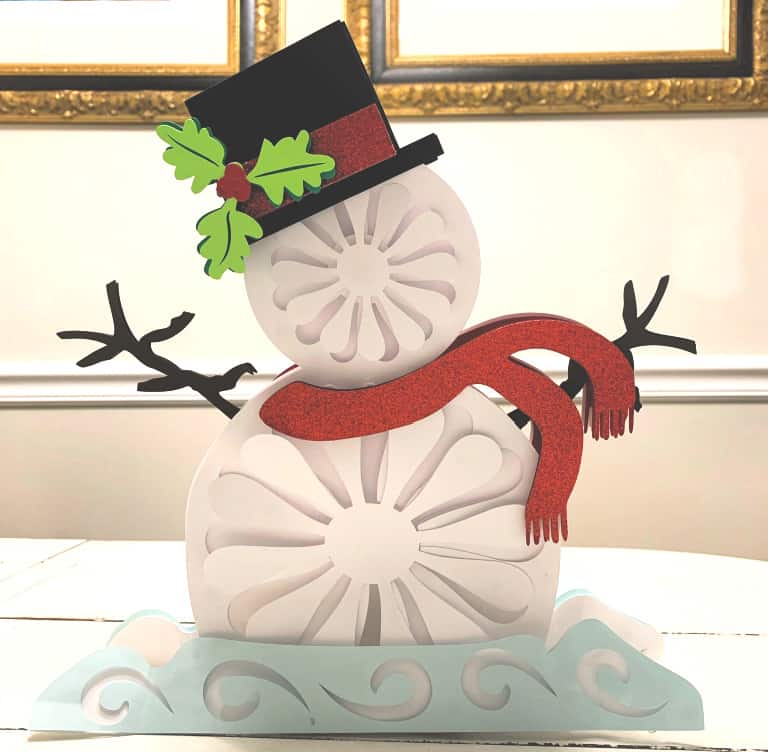
Another fun creation for the holidays! Learn how to make a 3D Standing Layered Snowman Free SVG! This guy looks complicated, but he is not! As with all layered designs, it just takes time and patience to put them together and they are so cute when you are done!
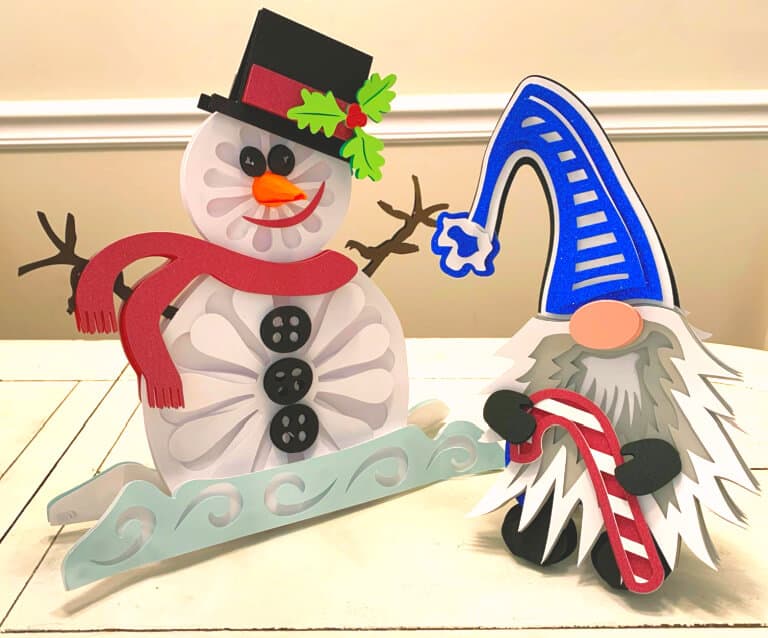
He’s sure to bring a smile to anyone who sees him! Wouldn’t you agree? He is the perfect companion to the 3D Standing Layered Gnome too!
Now available in the Resource Library! Mr. and Mrs. Snowman!
Let’s get started!
Supplies for the 3D Standing Layered Snowman Free SVG
- Foam Double Sided Stickers
- Cricut Maker
- 65 to 80 lb Cardstock in varying colors
- Mat
- Scrapper Tool
- Glue (I used Tacky Glue)
Instructions
I made a very detailed video on how to use the file in Design Space with a lot of tips and tricks on how to different things like laying out the objects on the mats, changing the colors, grouping and ungrouping, moving things to different mats, as well as how to assemble the snowman piece by piece! Sometimes it’s easier if you watch through the whole video before you start to make things. You will get ideas of what worked and how to approach it better!
Now here are the steps to cut and to assemble in written form.
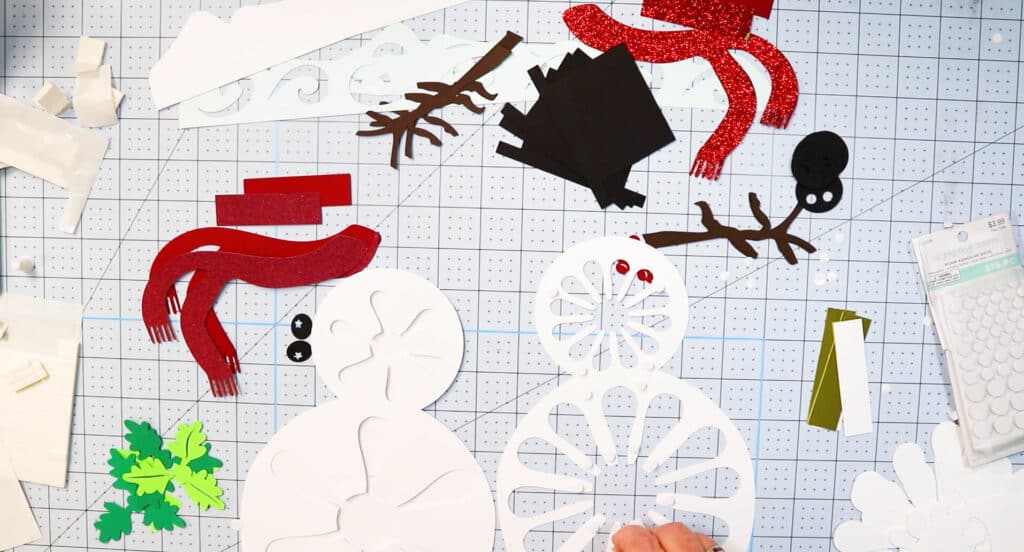
Once you have uploaded the file to design space, you will be able to cut it out and the pieces are already set to cut the number you will need.
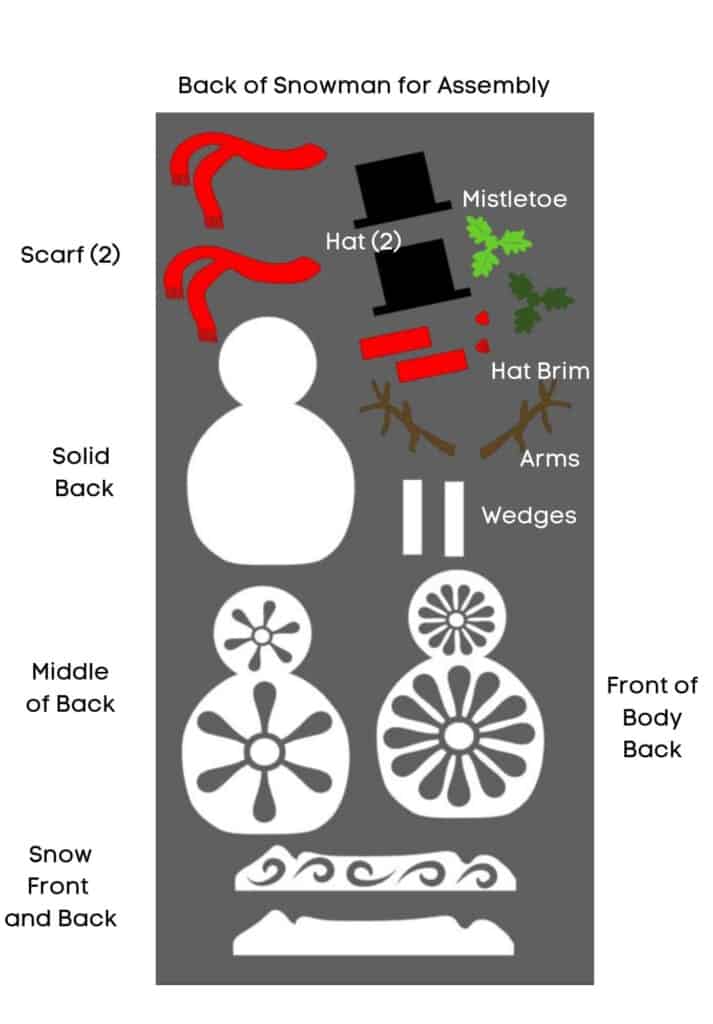
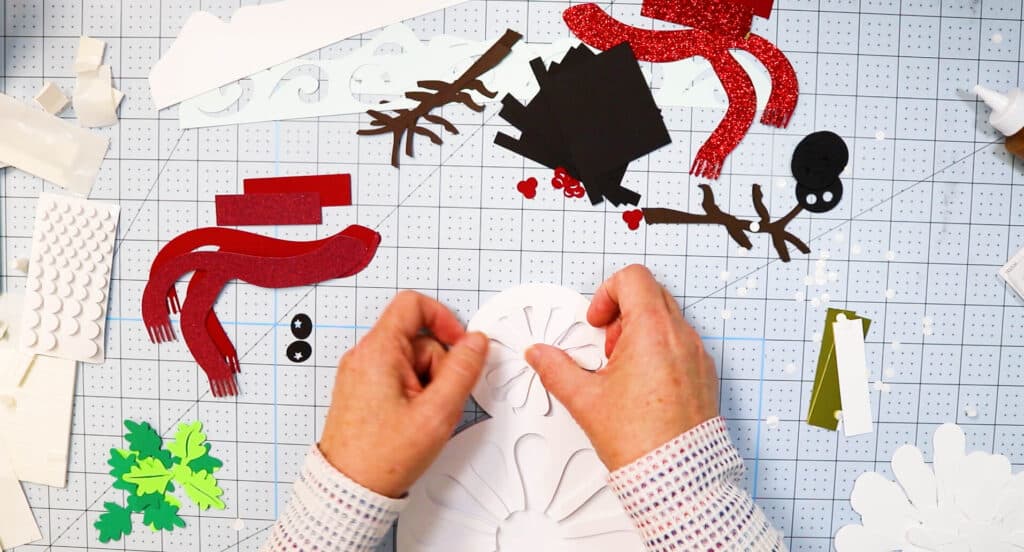
Assemble the back first.
first take the solid piece and add the middle with dots, then the front for the back with dots. Be sure to put the dots on the thin parts of the snow flake so they stick out and don’t collapse.
You can see where I put the dots on the snowman. Be sure to put them at the bottom and in the neck area for support. Do this for both the front and the back.
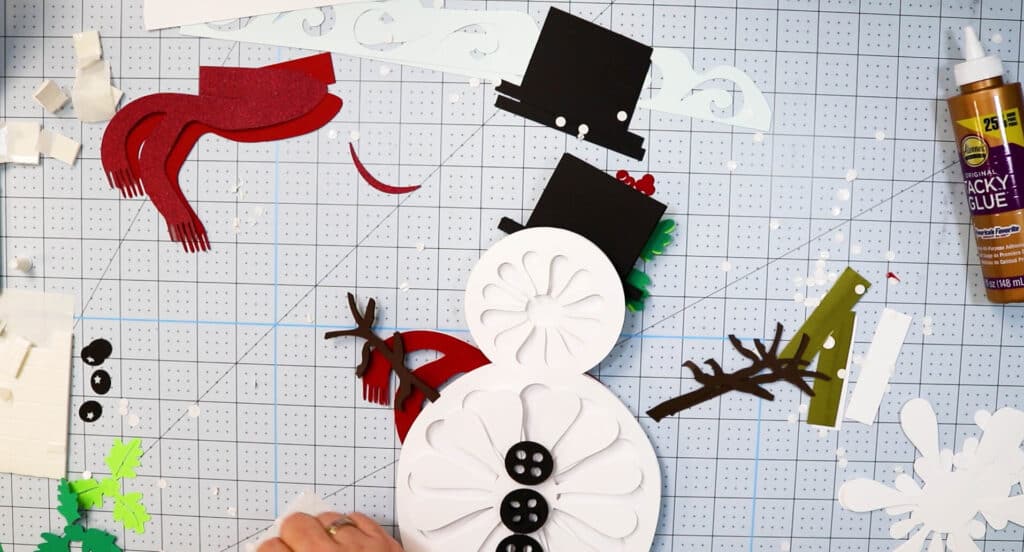
I added the cut out part of the snowflake and placed it on the front of the lower body and offset it so you could still see the cutouts. Then on the back I did it with the smaller piece on top and the bigger piece on bottom (easier to see in the video). This gave a place to attach the buttons to as well as cover the cutout circles on the back.
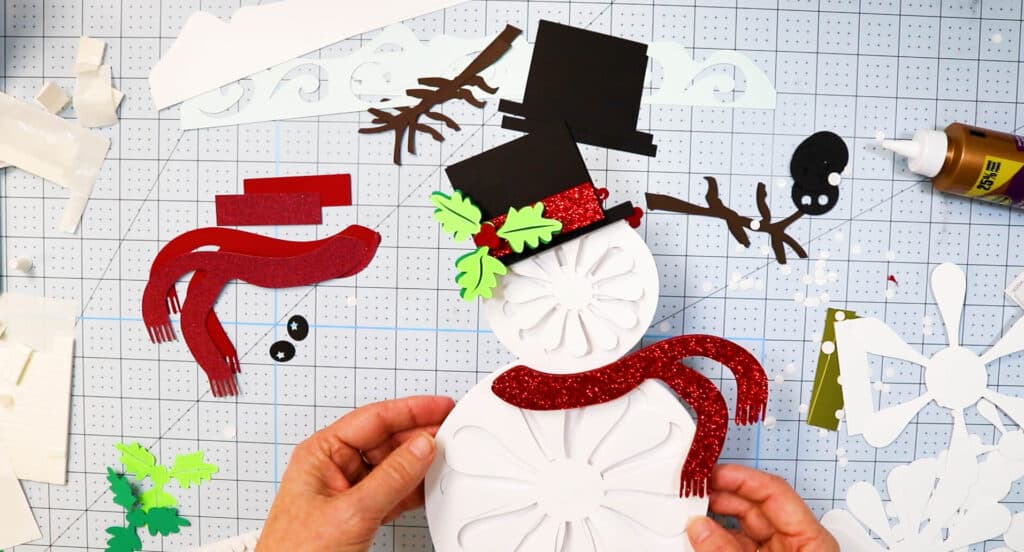
Then attach the scarf to each other and to the snowman’s neck.
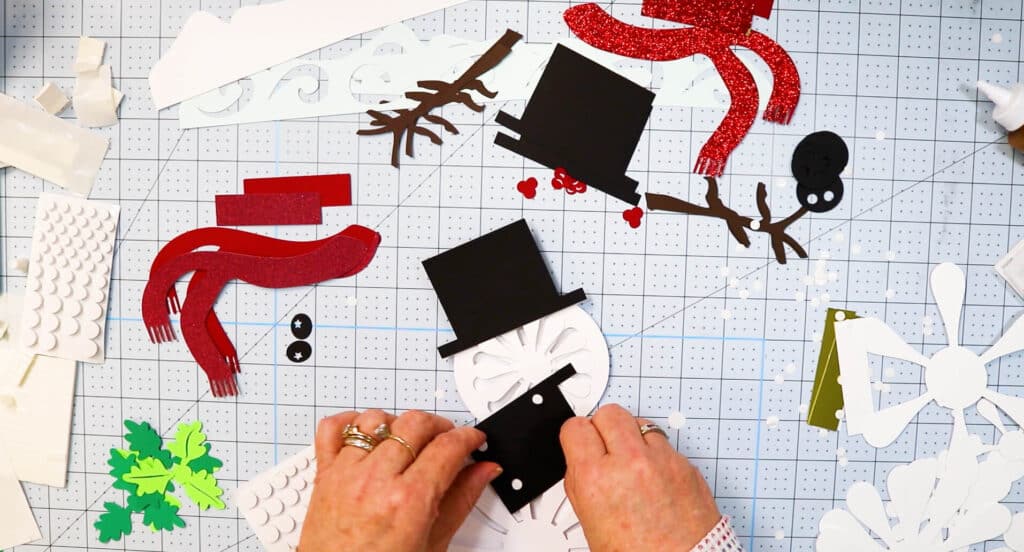
Then attach the hat, brim and the holly to each other with dots and place it on the snowman head.
This is s picture of the finished back.
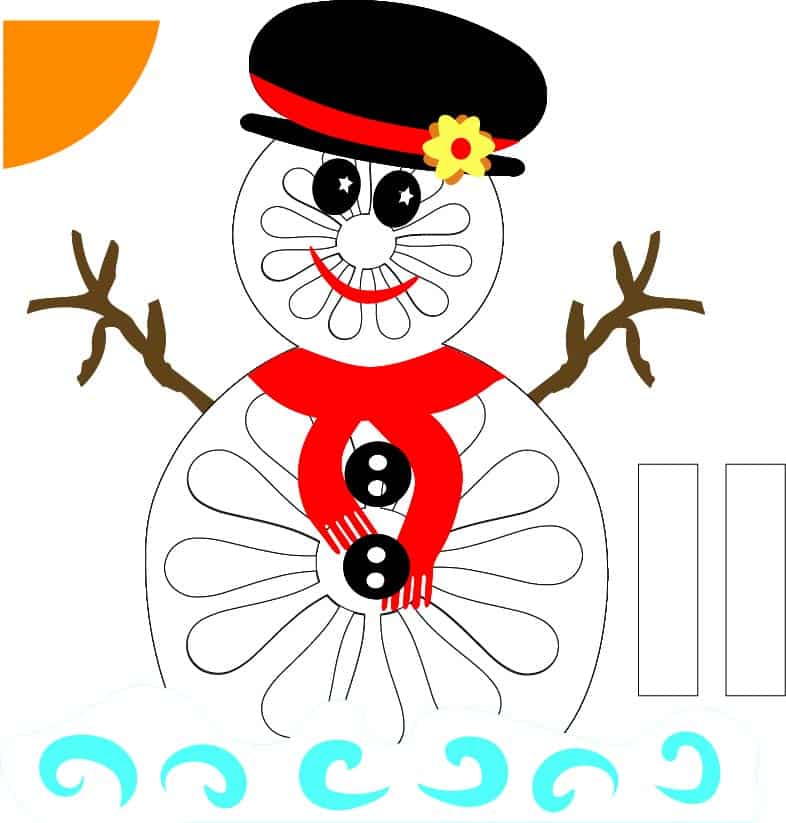
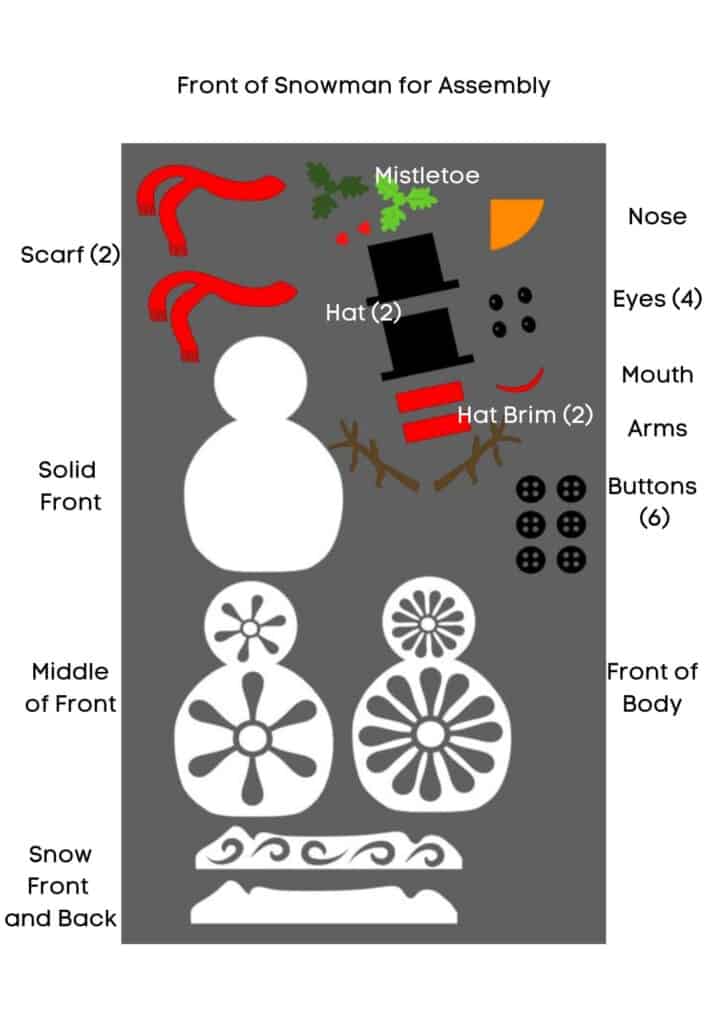
The front is done in the same manner except Do Not Put the cutout piece on the top of the head.
The nose will go inside the circle and be glued there.
Add the arms next. They will attach to the solid body parts front and back. Finish up by attaching the hat, mistletoe, scarf, buttons and eyes in that order.
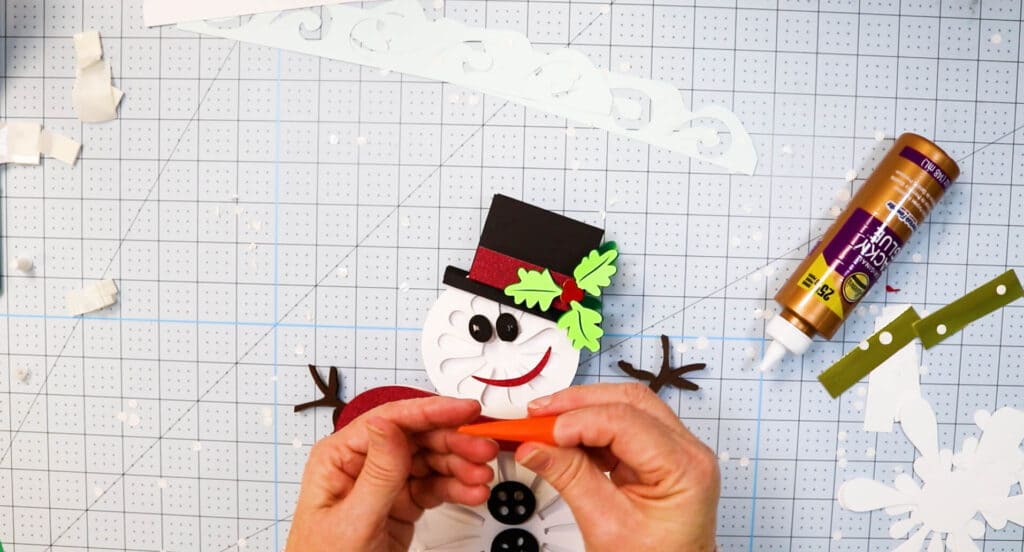
For the nose, roll the orange triangle with your fingers to form his nose. Check that the bottom will fit inside the little hole on his face and glue it down on the side and add glue to the bottom of the nose and put it inside the hole.

Fold the wedges so you can attach the bottom front and the bottom back together. At the top of the Snowman’s head attach front and back with dots.
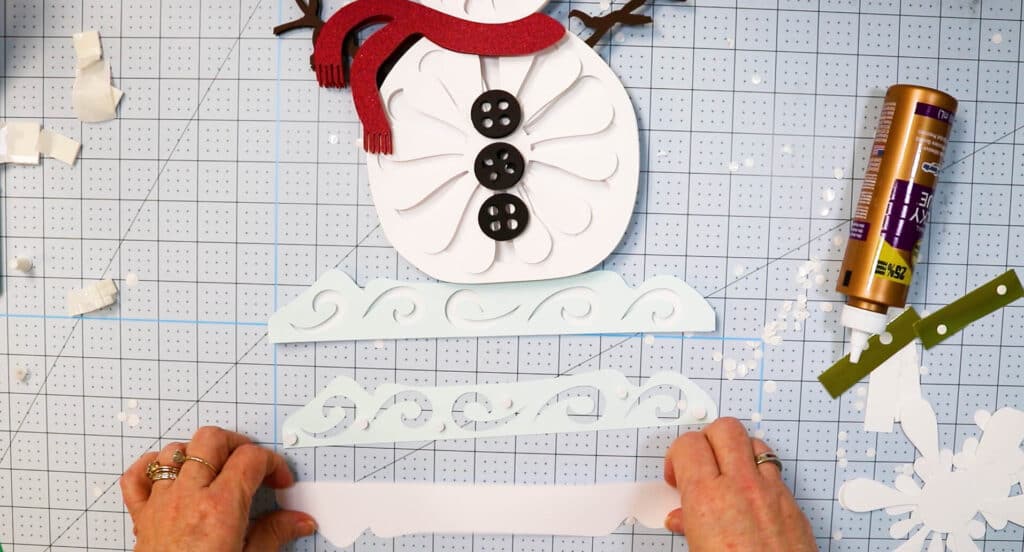
Attach the 2 snow pieces together. One set will go on the front and one on the back. Use dots to attach to the bottom front and bottom back of the snowman.
That’s it! That’s all there is to assembling the 3d Standing Layered Snowman Free SVG.
Want to learn how to make the 3D Standing Christmas Gnome? Check out the post here!