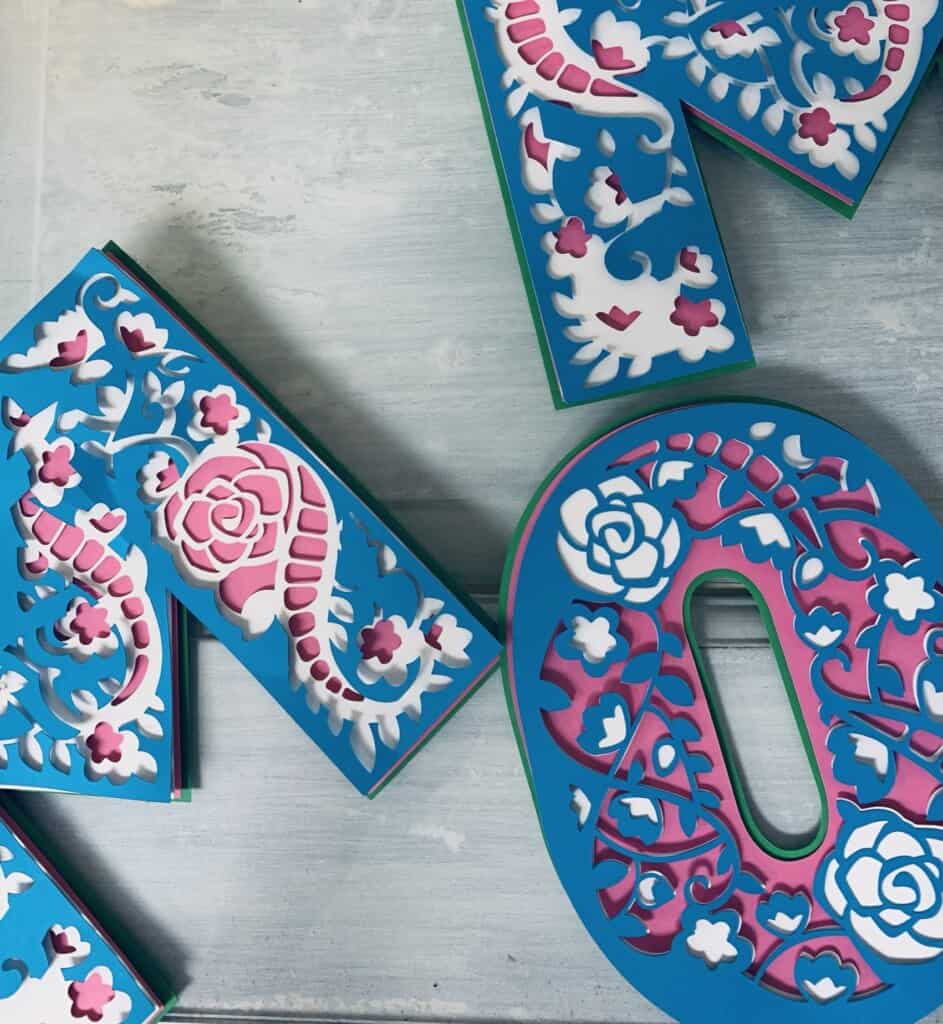
Mother’s day is fast approaching and I’ve had requests for many Mother’s Day files to make with your Cricut. These 3D Mom Mandala Letters are available Free to you in Cricut Access as long as you subscribe!
To learn more about Cricut Access Subscriptions, they have a really good overview of them here. You also get discounts on qualified purchases in the Cricut Shop that will help pay for itself in no time!
Not a member of Cricut Access and don’t plan to be? Then get our free MOM SVG here!
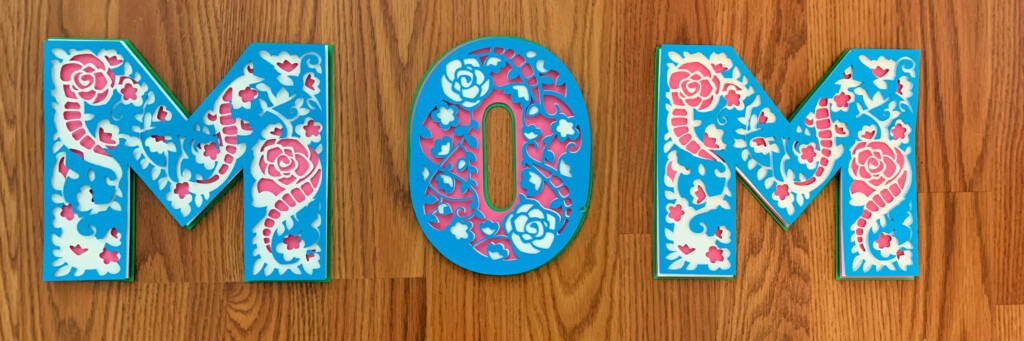
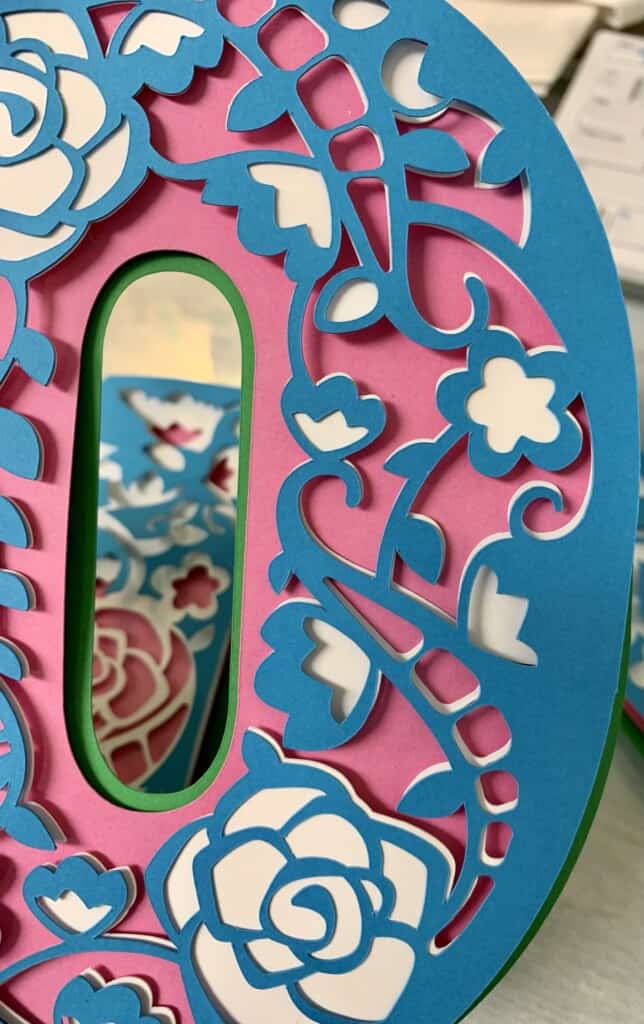
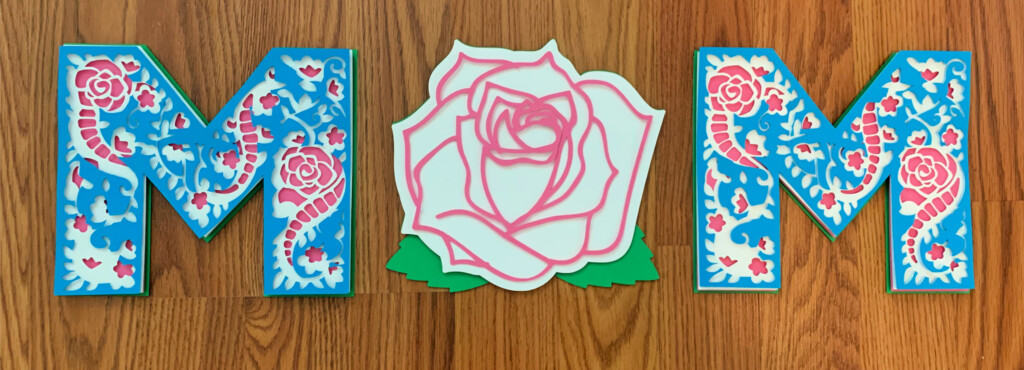
If your mom is like my mom, she loved her roses so I couldn’t make this without having a big rose! Which do you like better?
These letters are already for you inside Access for Design Space Images and the link is available when signing up here!
If you are already a member, you can get the link in the Free Resource Library!
Once you join, a pop up will open and give you the password for the Library. Confirm and you’ll be on your way! You will also get an email with the password and it is always at the bottom of my emails in case you forget!
Sign up to get the link here:
Supplies for 3D Mom Letters
- Foam Double Sided Stickers
- Shadow Box
- Cricut Maker
- 65 to 80 lb Cardstock in varying colors
- Mat
- Weeding Tool
- Cricut Brayer
- Cricut Scraper
Instructions for using the Template in Access
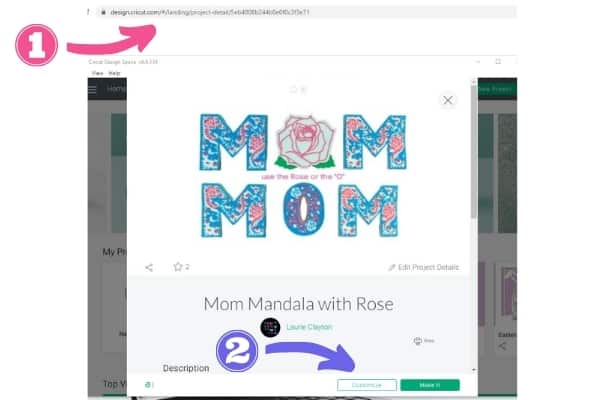
- First get the link and put it in your browser
- This will pop open when you log into Design Space, click customize so you can change the colors.
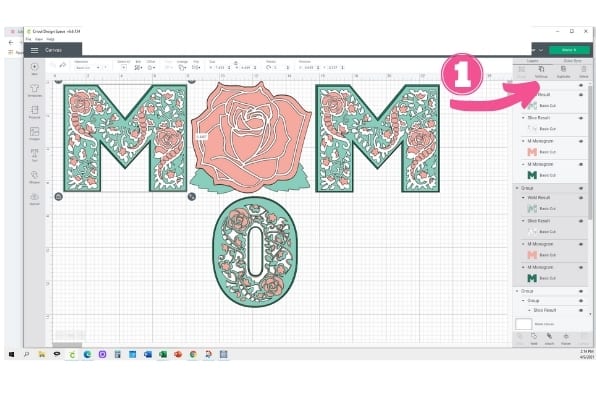
- Chose one letter at a time and notice they are grouped. Ungroup to be able to change the colors of the layers.
- Select the layer over to the right one at a time to change the color.
- Change the color in the top tool bar to your desired color.
Do this for each letter and/or the Rose. Also resize these at this point to whatever size you would like.
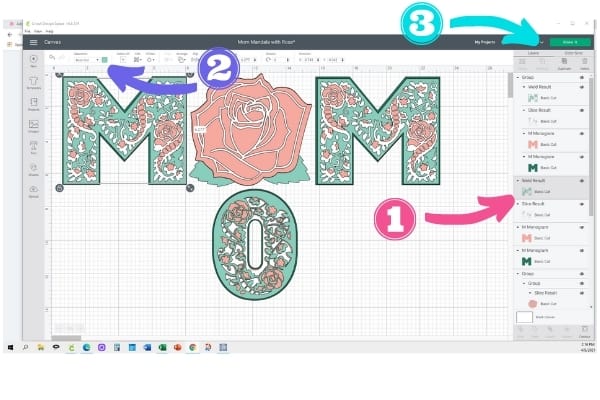
A tip is to select all together and resize them all at once so you maintain proportions! - When you are happy with the colors and size, click Make it.
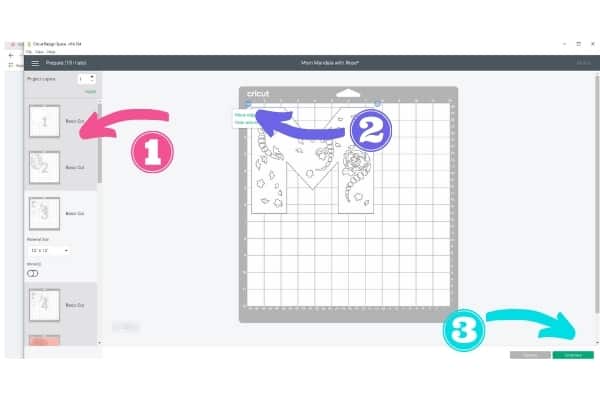
- On the mat screen, I like to see if things can be moved to make the best use of my paper.
- Use the 3 little dots in the upper left corner of the mats to move them around.
- Whenever you are done, click continue.
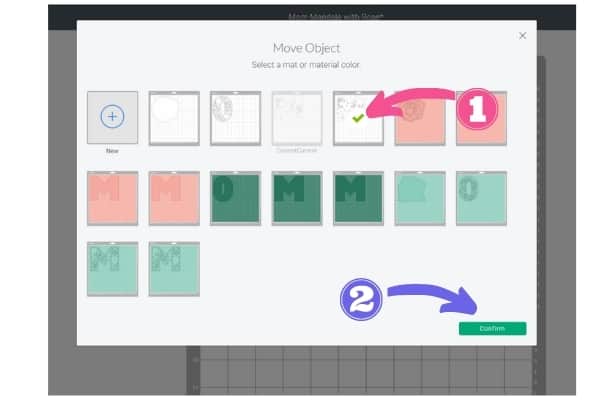
- Once you select move, this screen will pop up. The greyed out mat is the one you are moving. Click on the mat you want to move it to.
- Then click Confirm
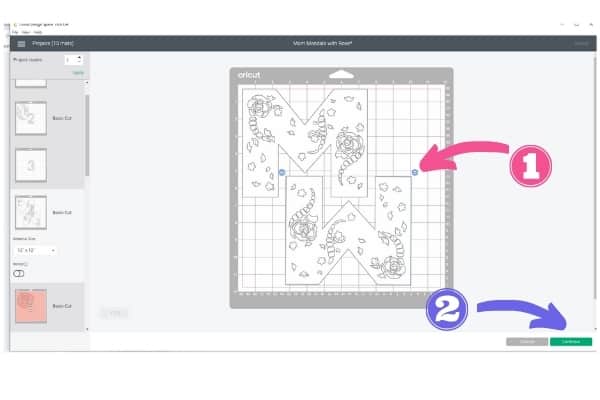
- The letter will you moved will be in the upper right corner ON TOP of the other design. Just click on it and drag it off. Then use the little rotate circle in the upper right corner to move it around and position it so that it is not touching the other design. Do this for each design you would like to move to another mat.
- Then click Continue to cut
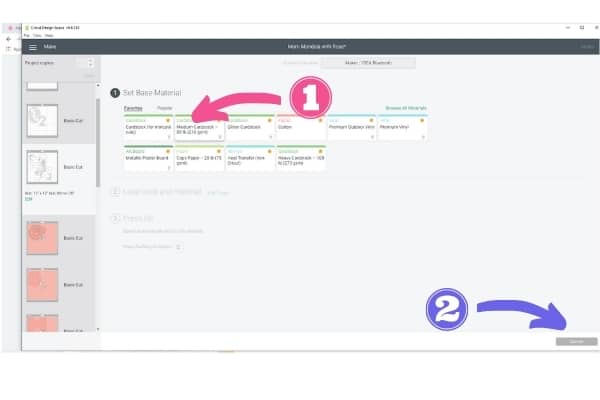
- Click on your material
- Click on Start to cut.
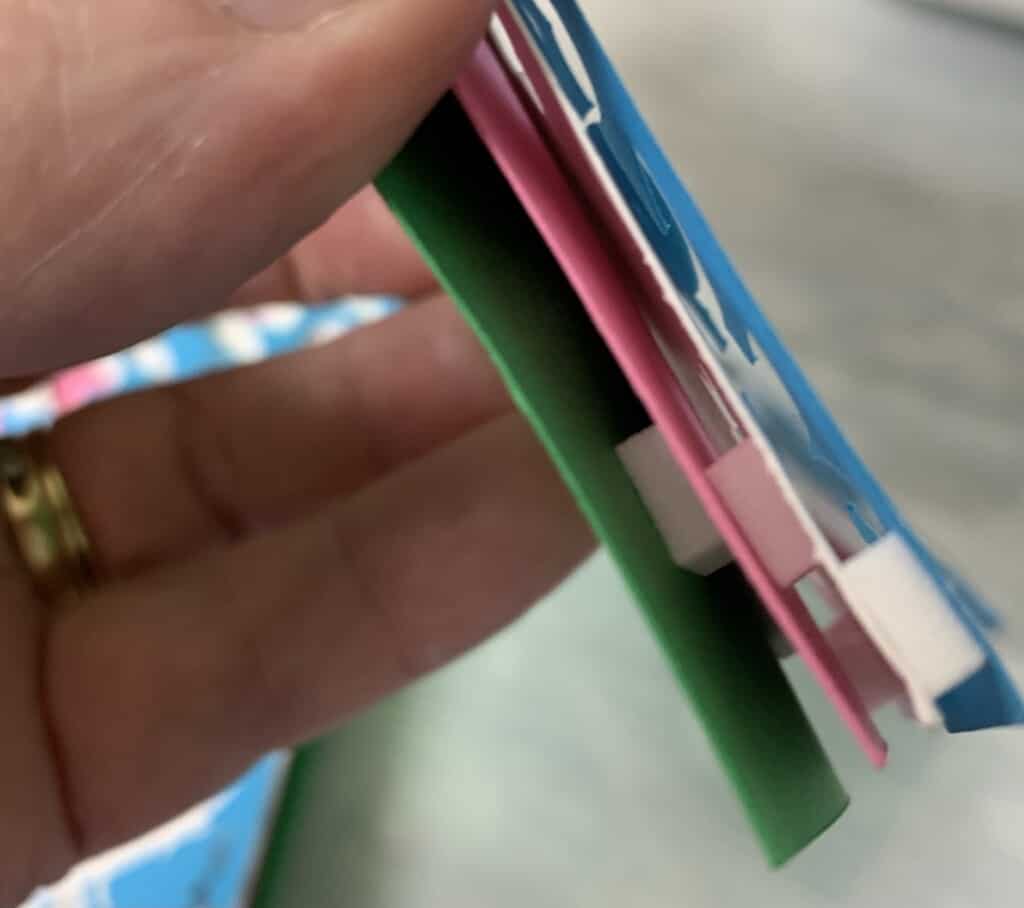
Assembly is easy. The letters are a bit offset with the backing so be sure to lay them out to get a feel for where to place the foam dots to give it that 3D effect.